
How To Blend In Procreate
Ipad Lettering For Beginners How To Use Procreate 2020 Lettering Daily
www.lettering-daily.com

Changing Colors To Greyscale
folio.procreate.art

Smudge Brush Pack Procreate Brushes Free Smudging Procreate Ipad Art
www.pinterest.com

Paint Brush Set For Procreate Alicja Prints
alicjaprints.com

How To Blend 10 Tips To Improve Your Blending In Procreate In 2020 Cloud Painting Digital Art Software Procreate Tutorial
www.pinterest.com

How To Create And Customize Procreate Brushes
design.tutsplus.com
There is so much i would like to share with you.

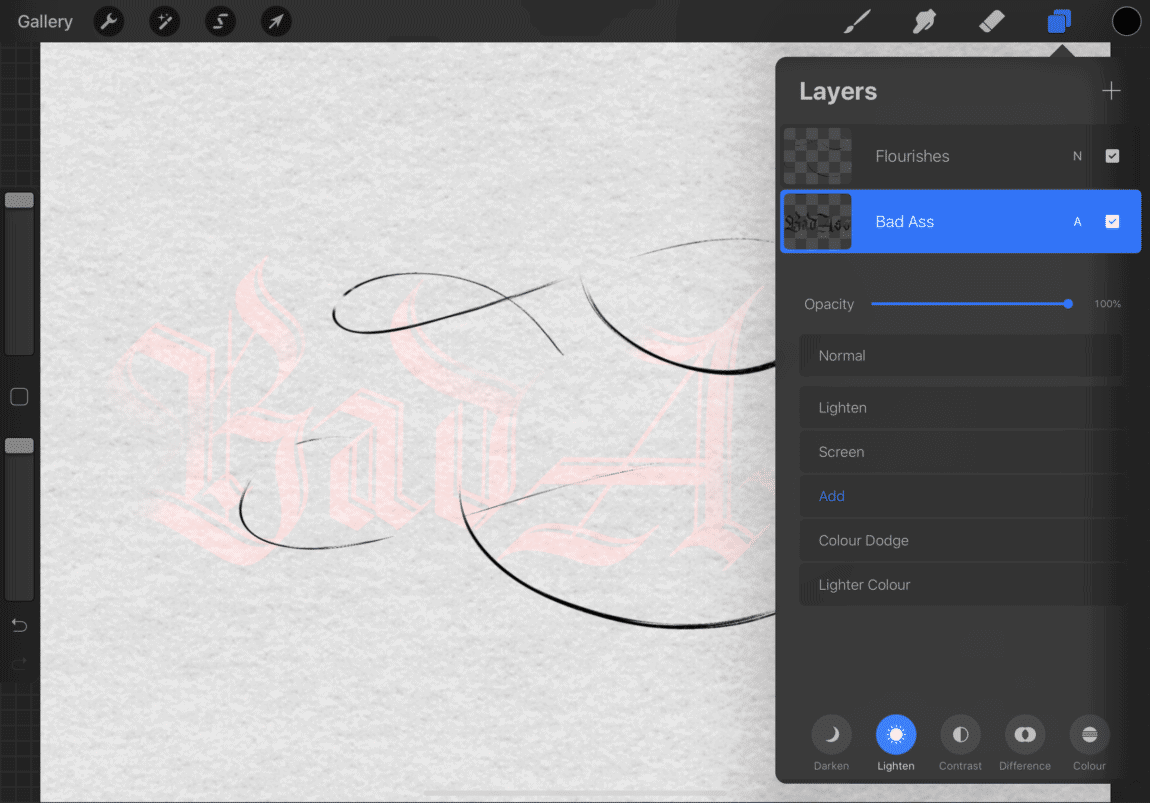
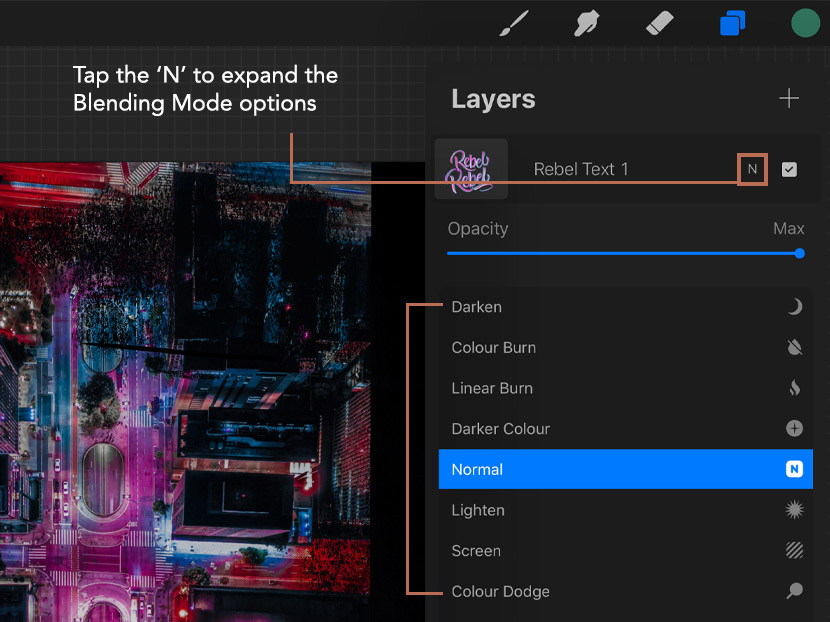
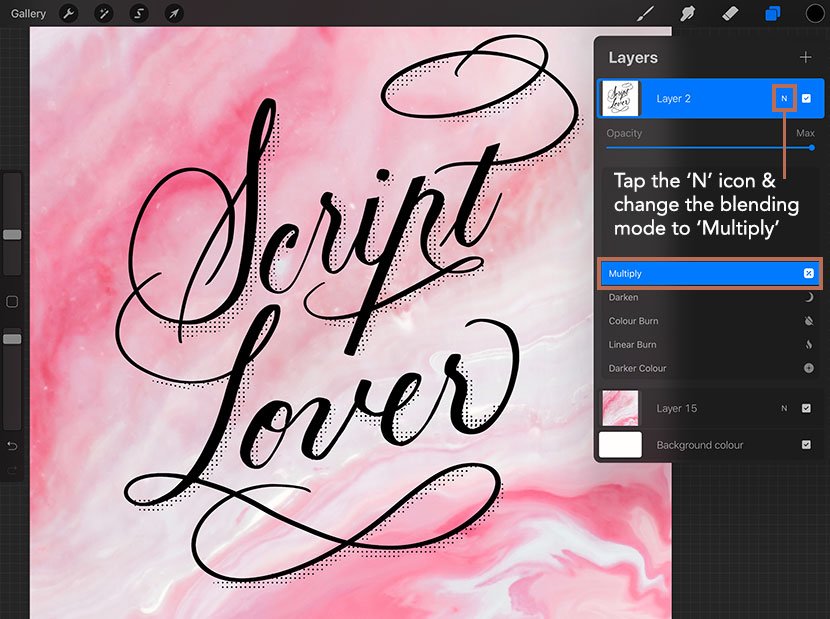
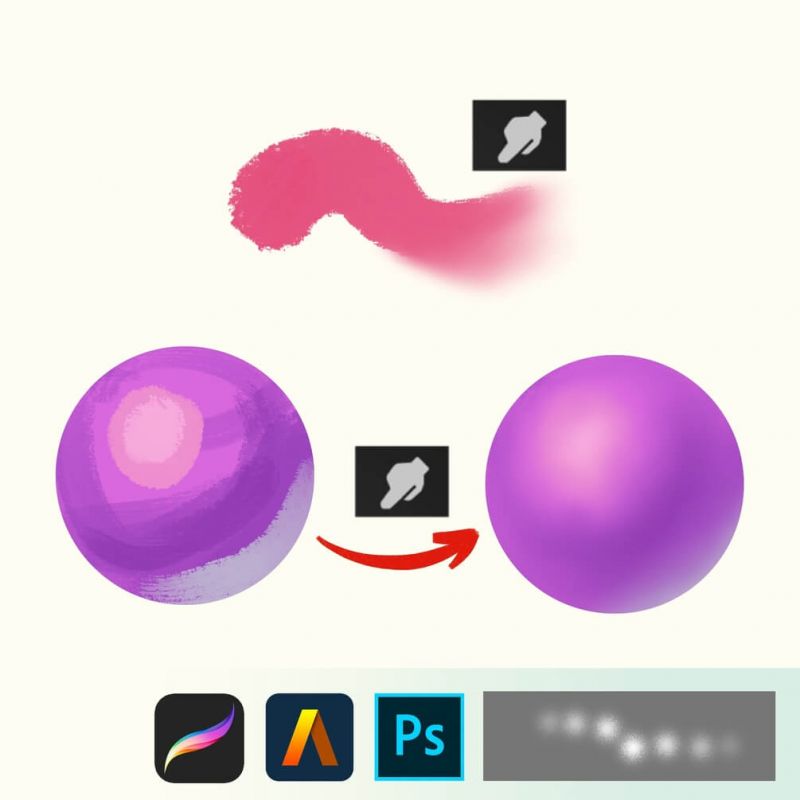
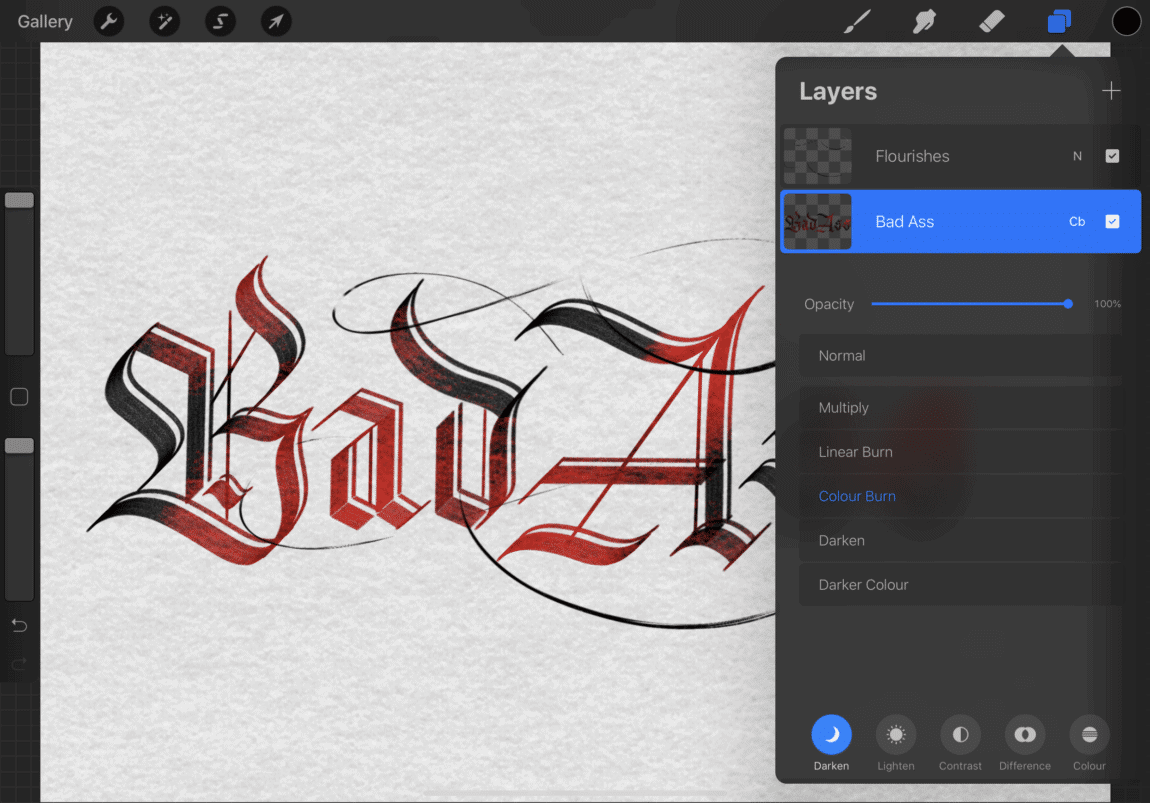
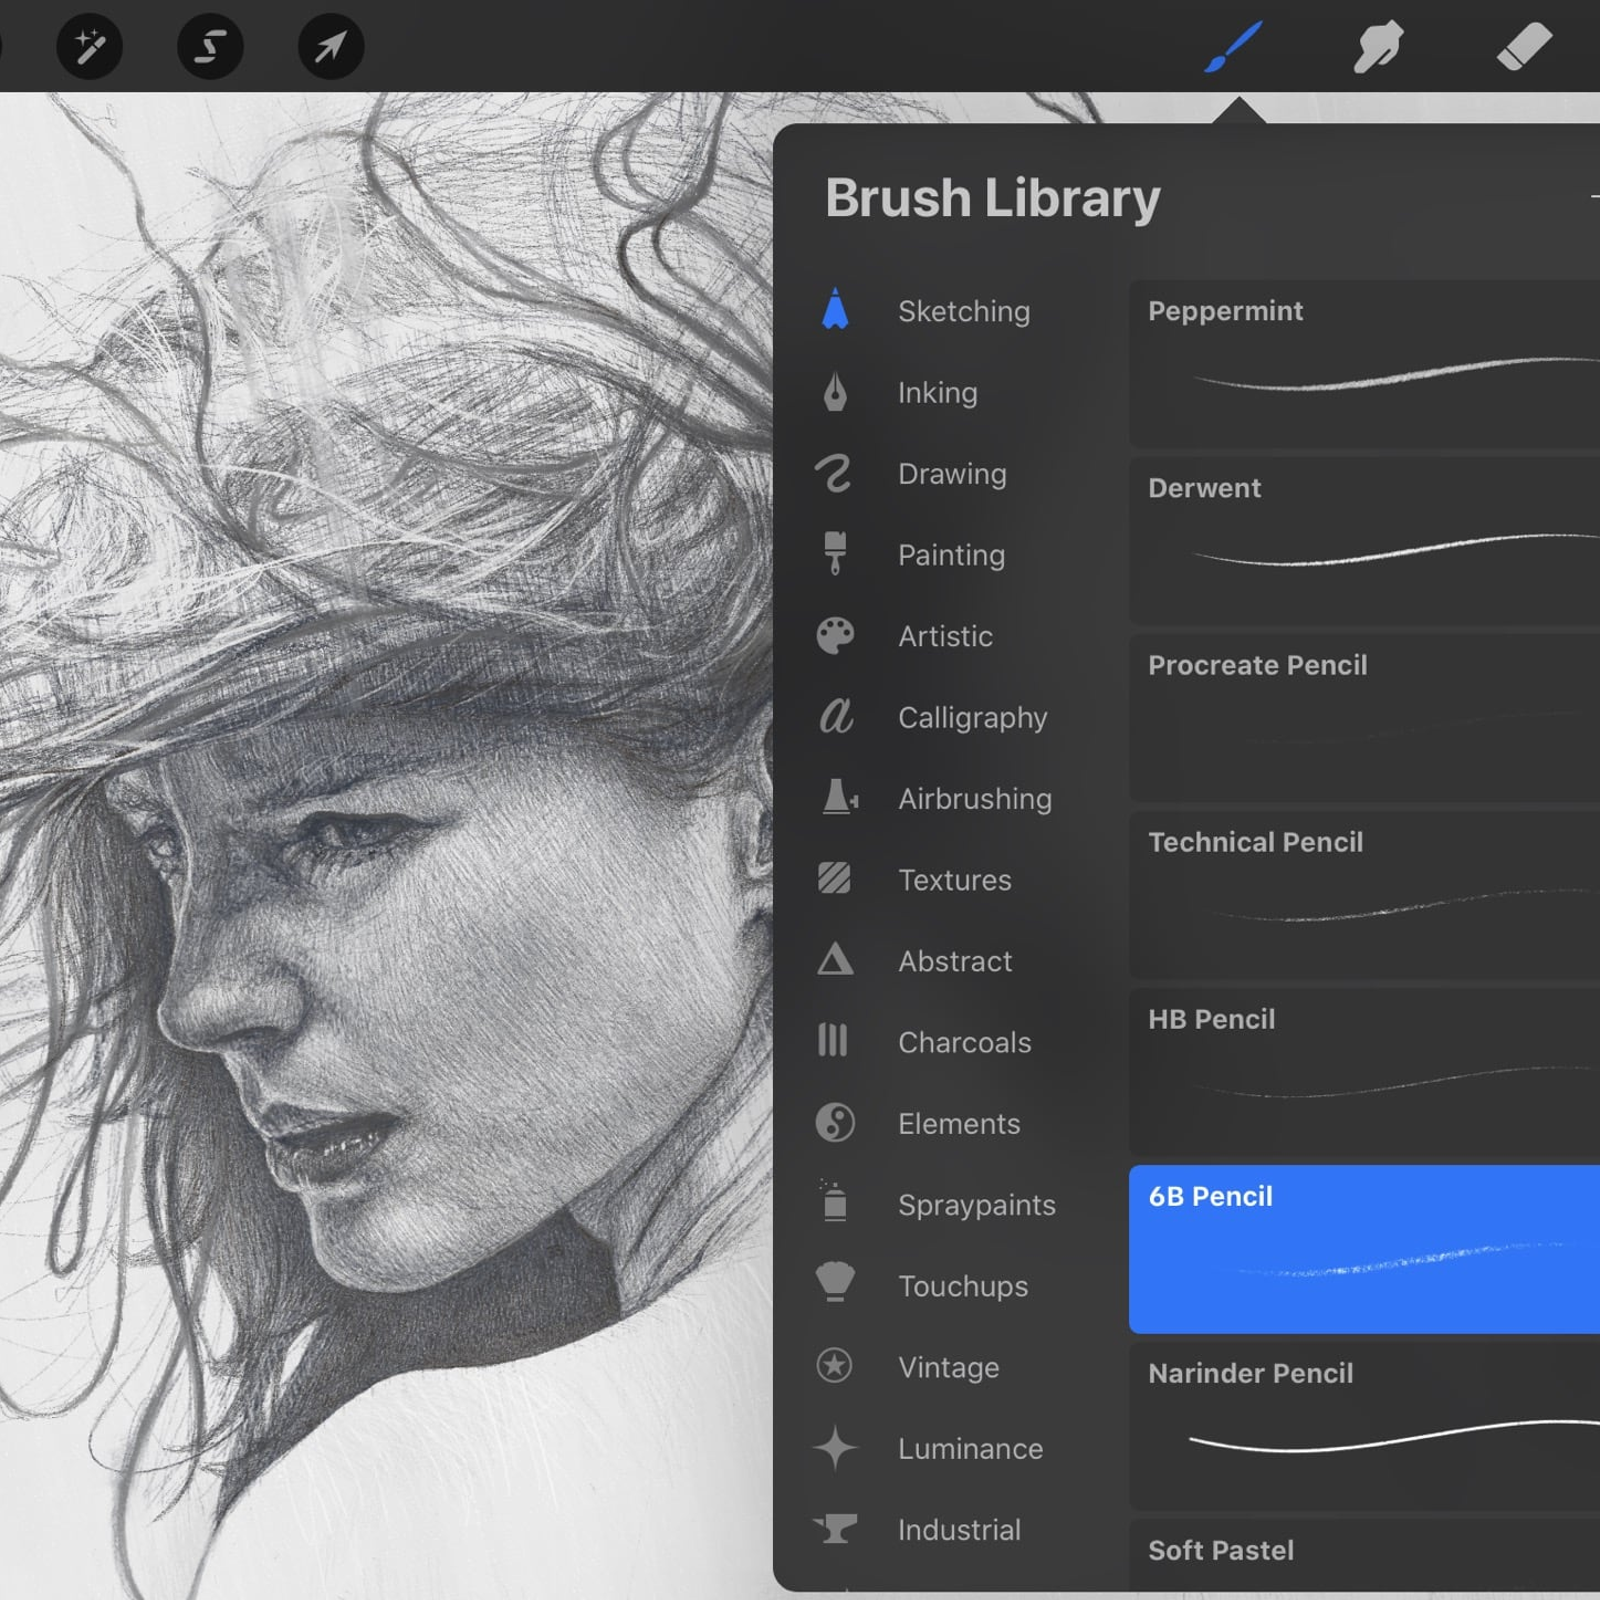
How to blend in procreate. Draw the colors you want to blend next to each other as in the video. On the right hand side of each layer youll see one or more letters. Blending modes are a great way to get really interesting results in your procreate designs.
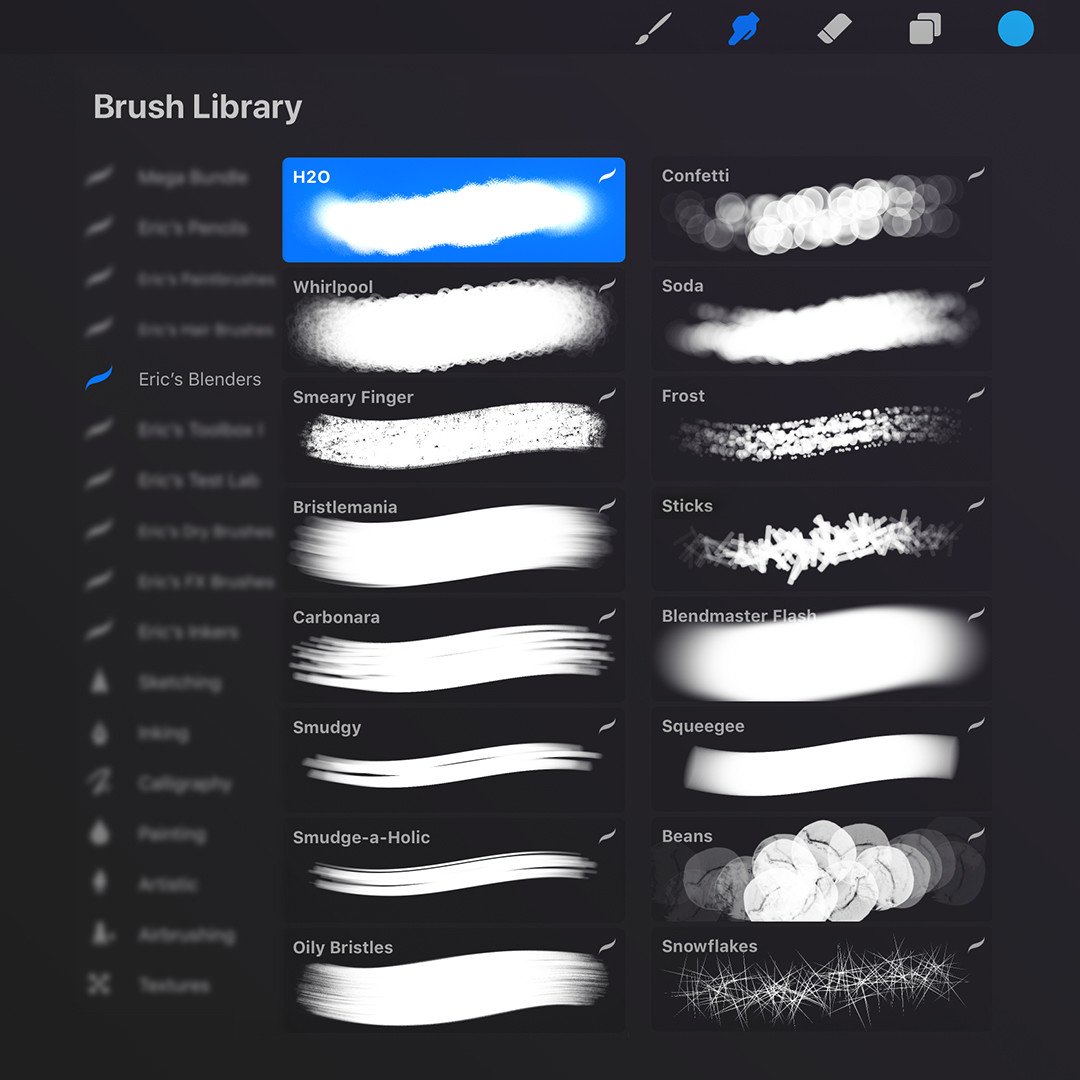
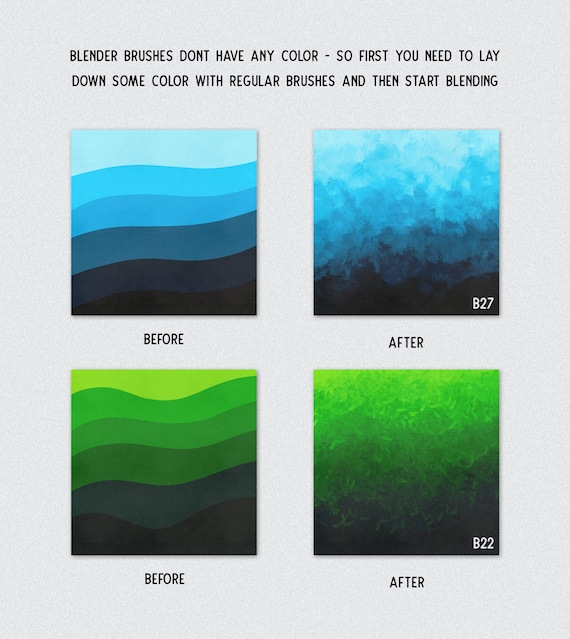
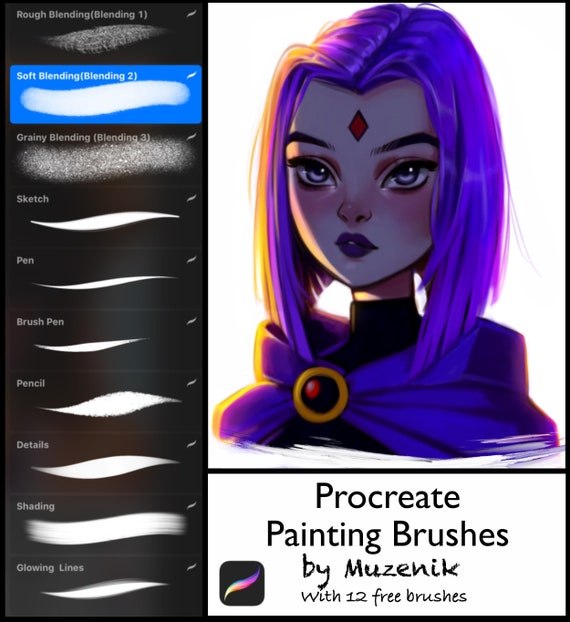
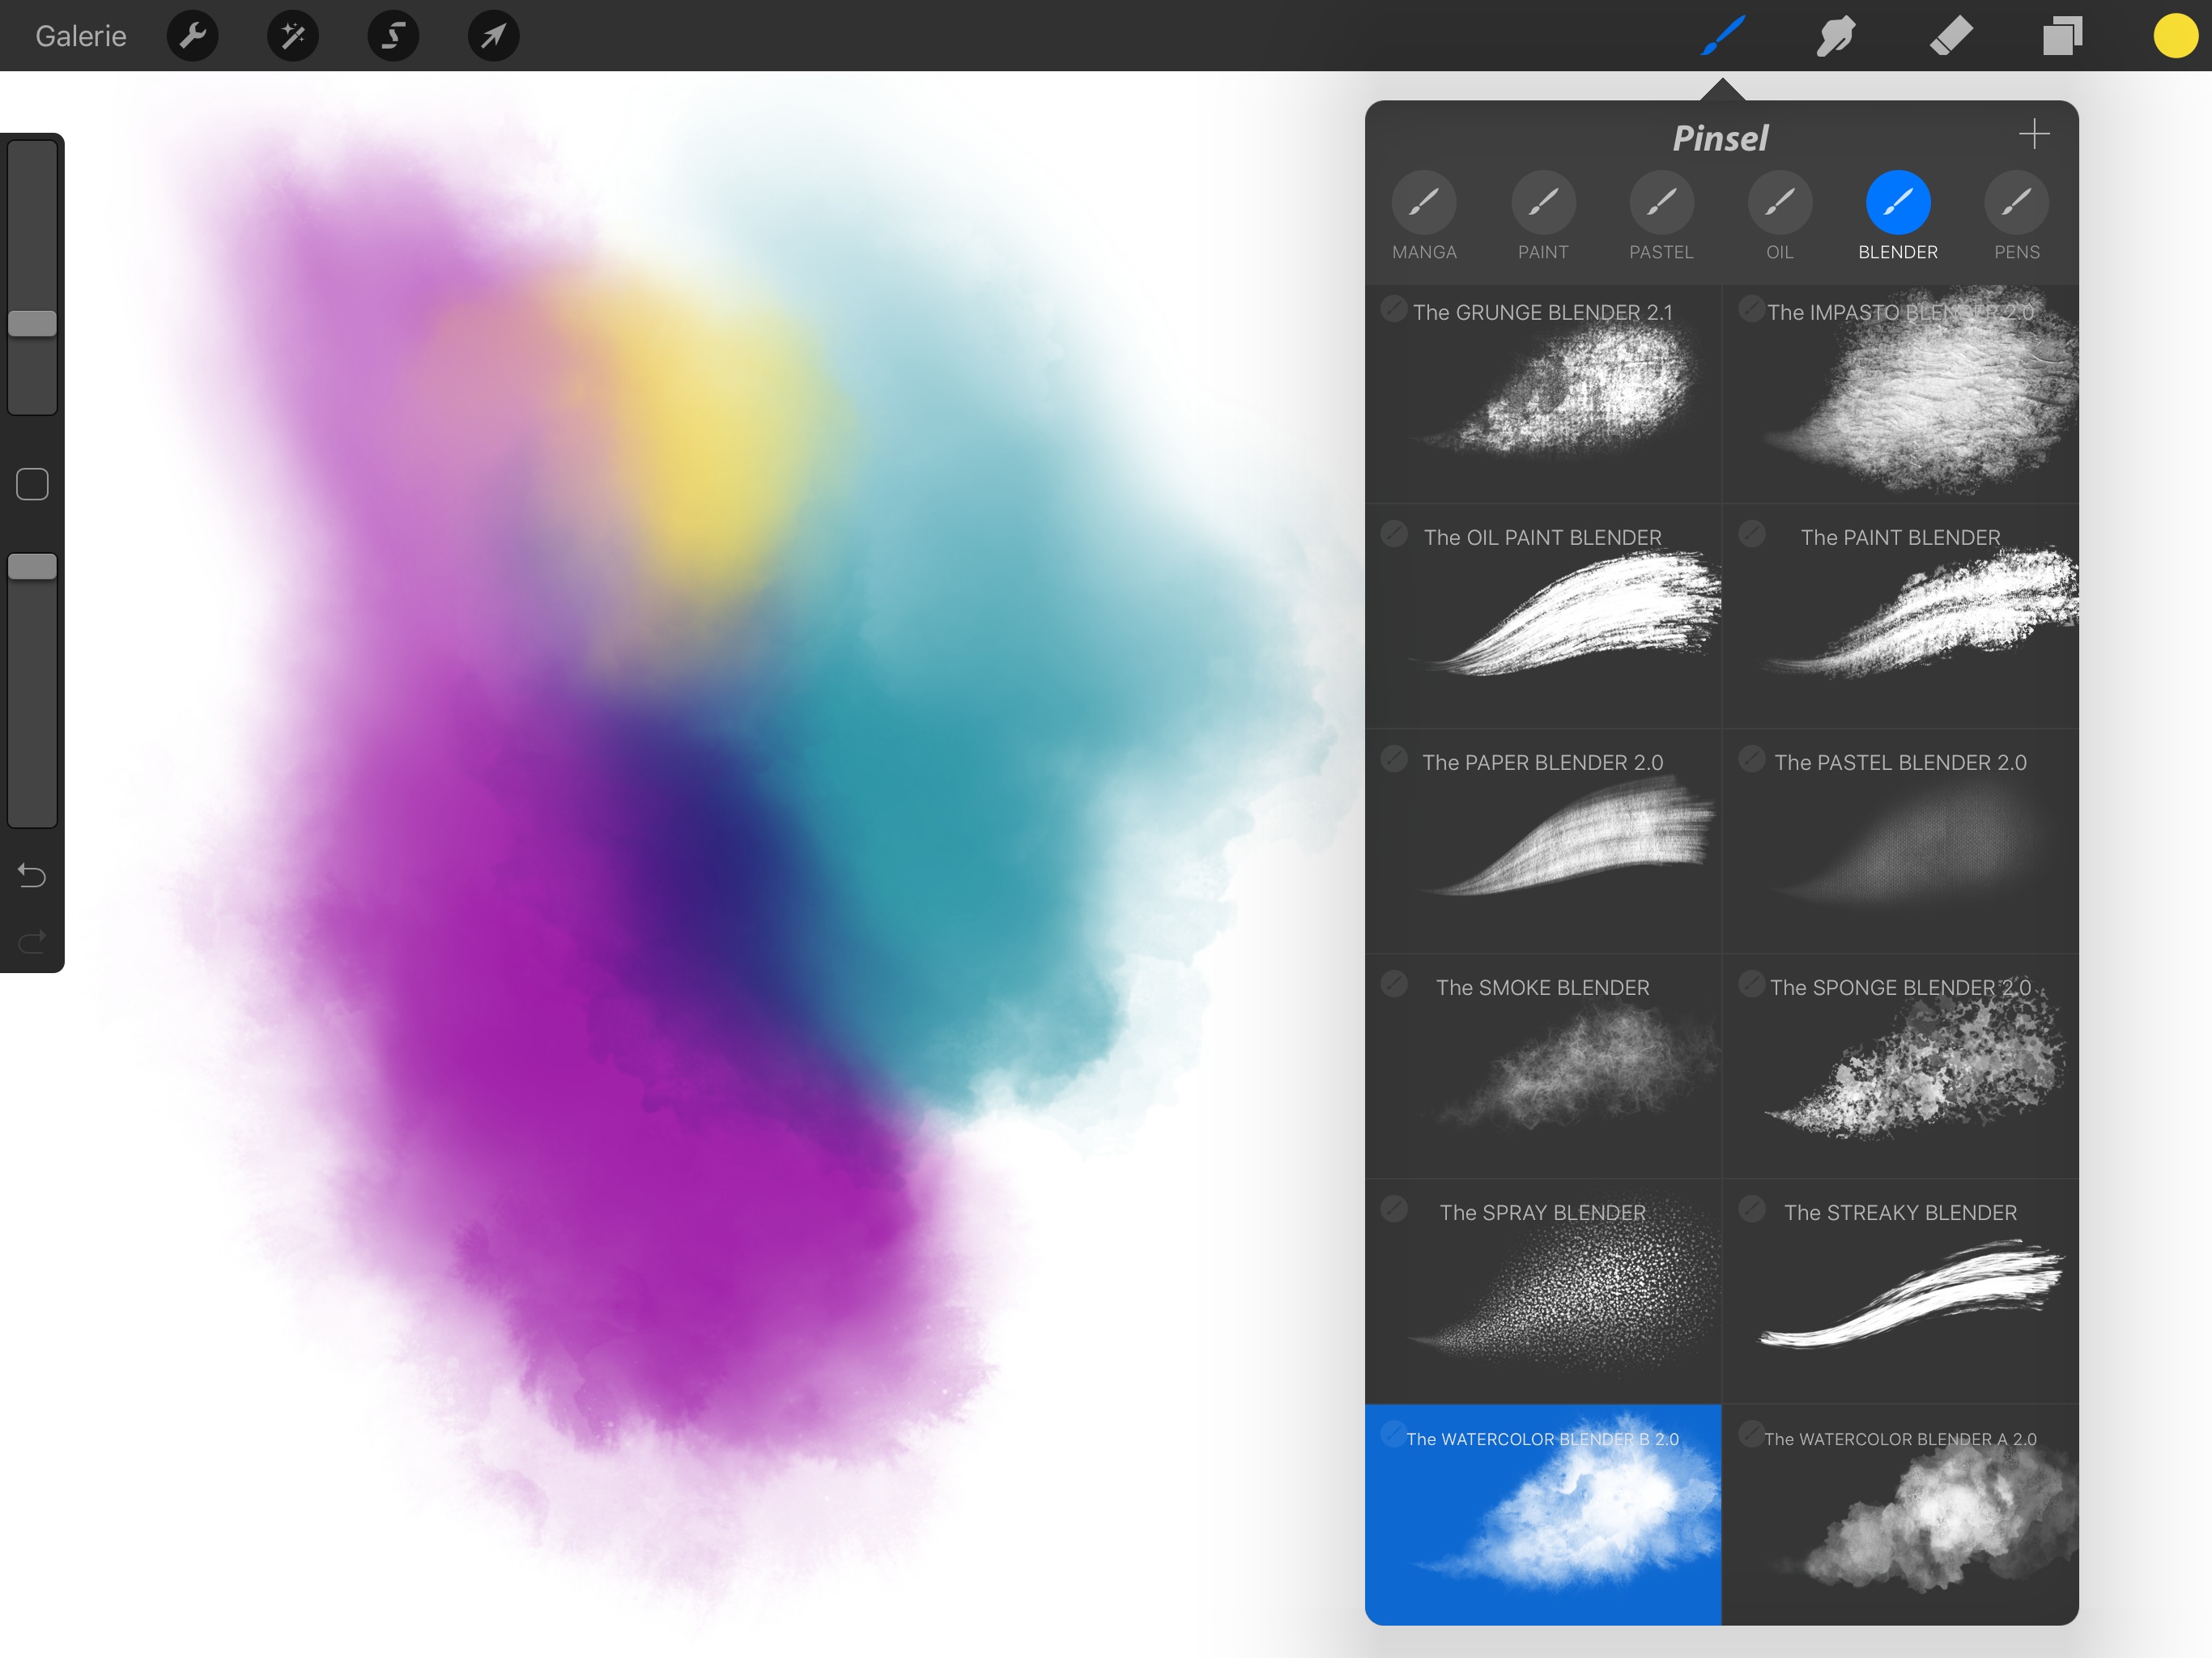
With all the different brush libraries its hard to know what brush will give you the best blending result. When blending colors in procreate dont forget to vary the size of your brush. I have tried blending objects with many different brushes and tools and ive found a process that yields amazing results.
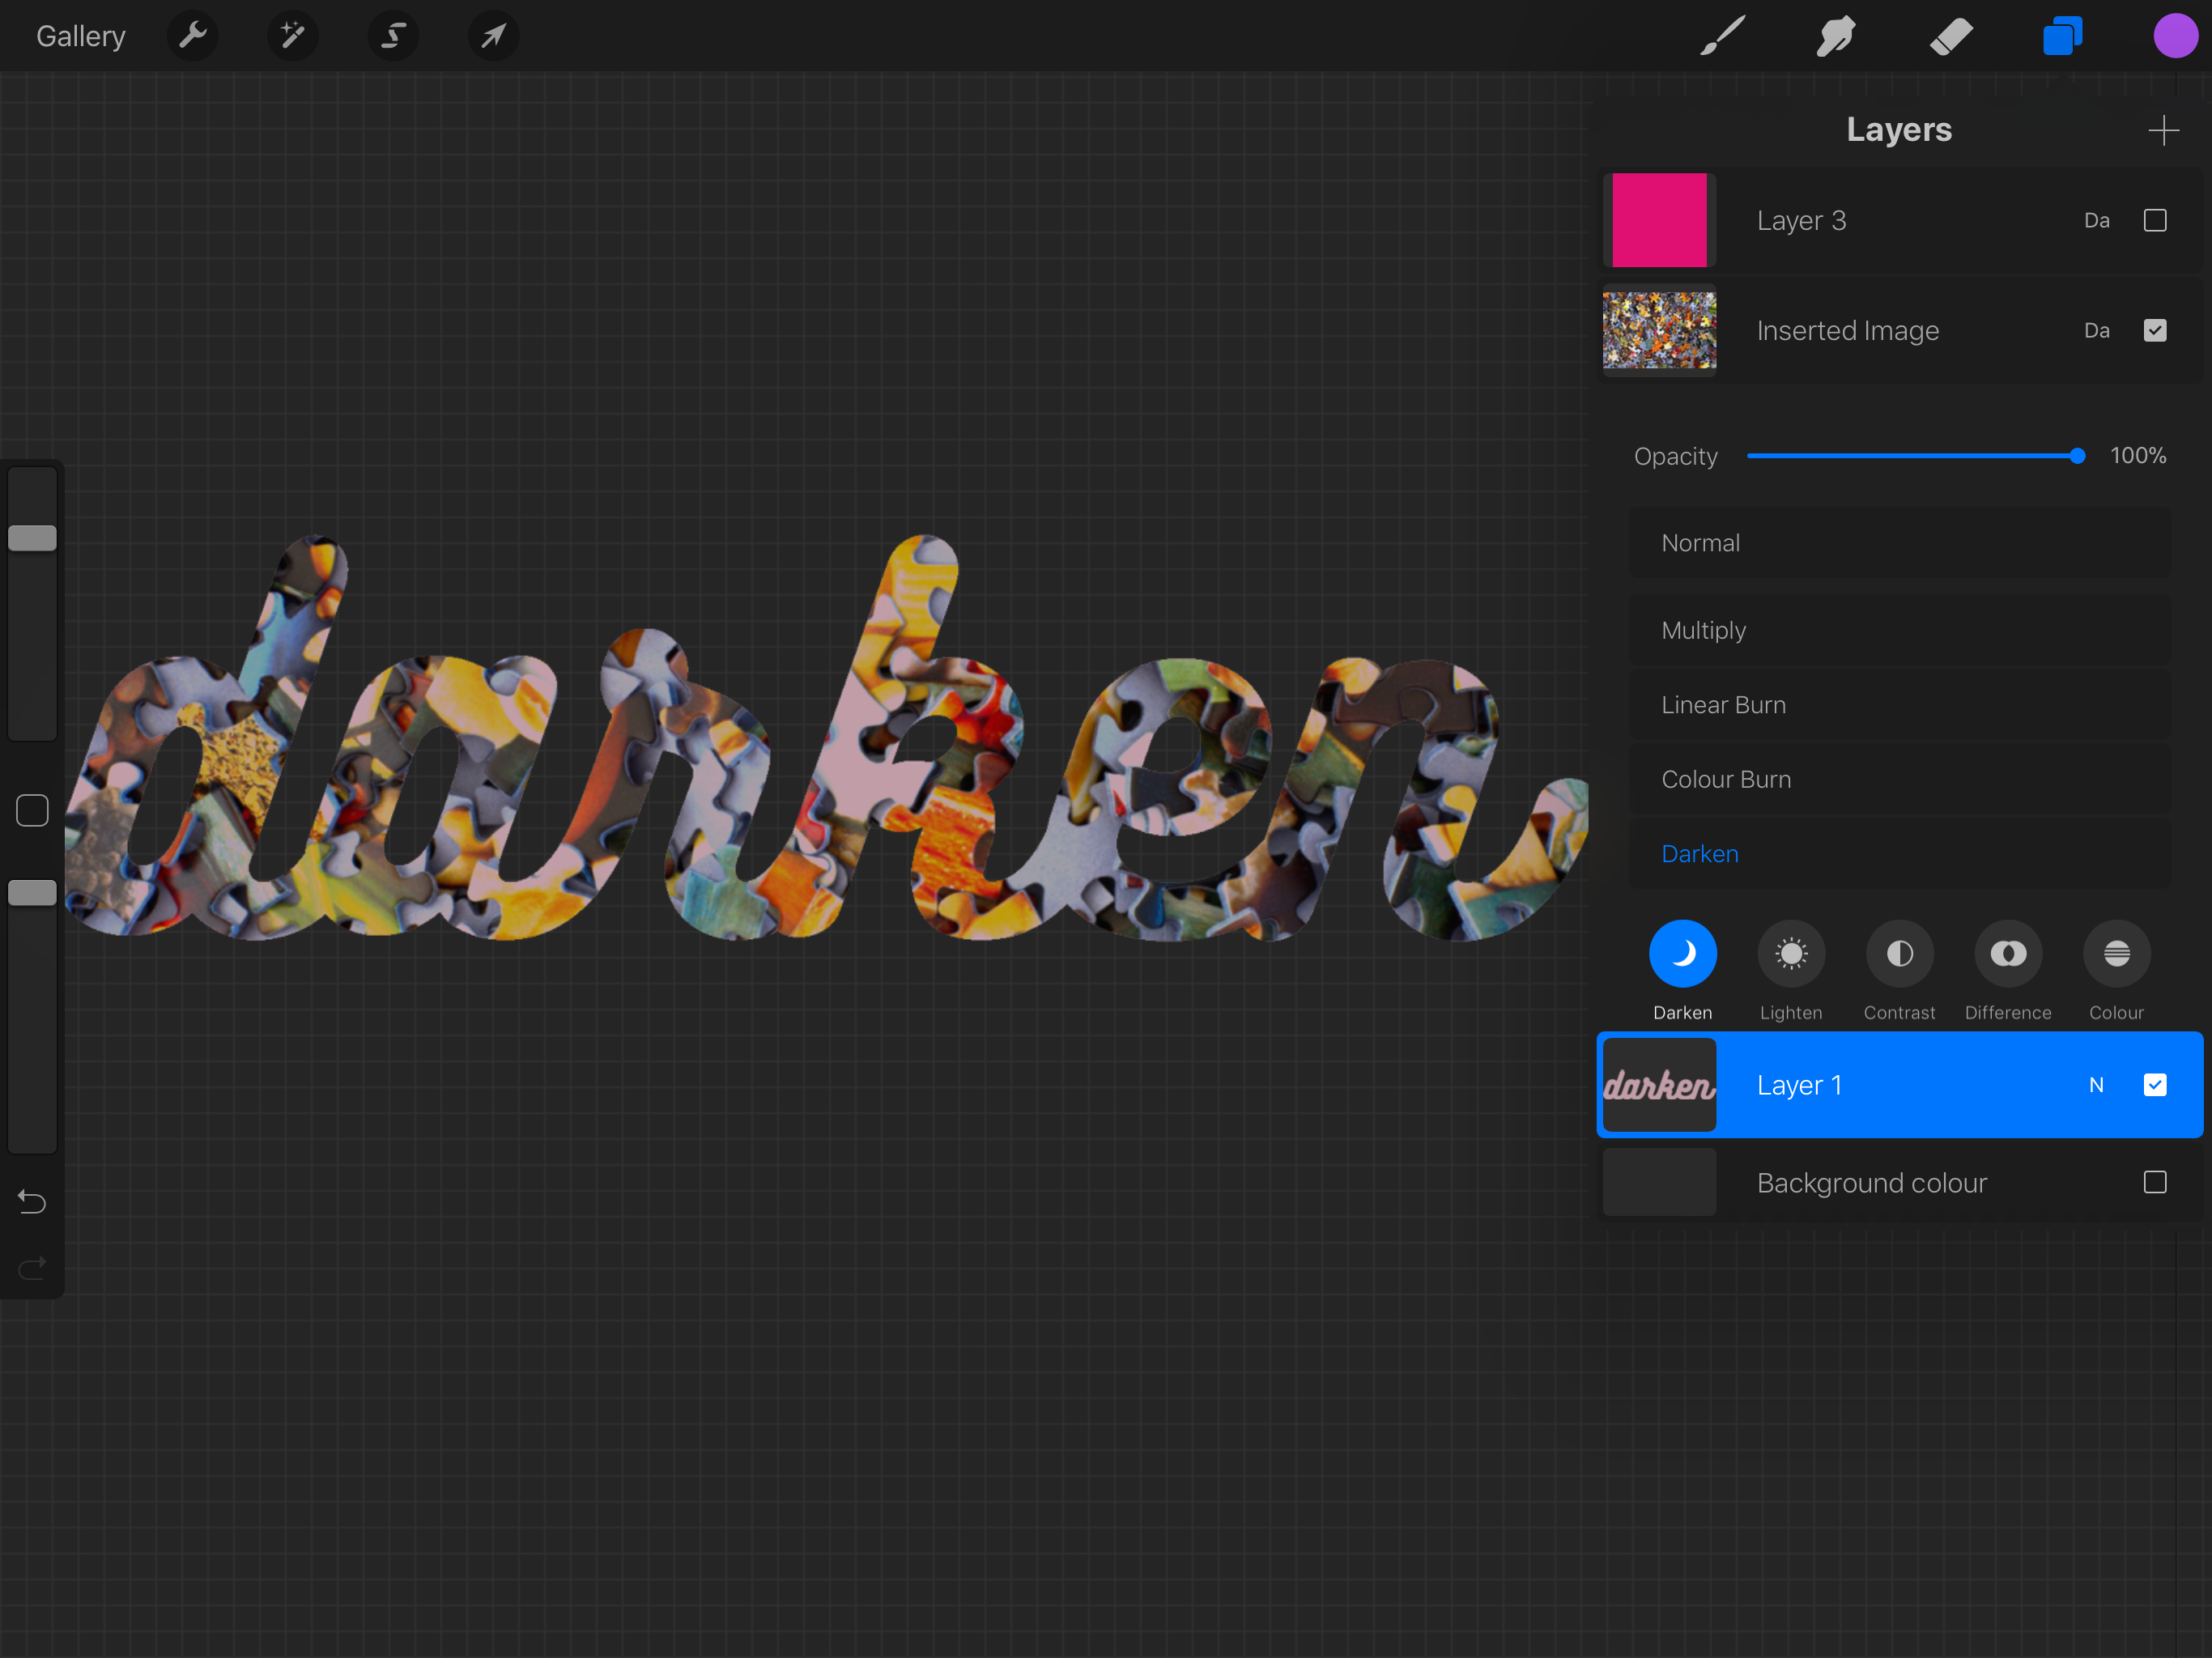
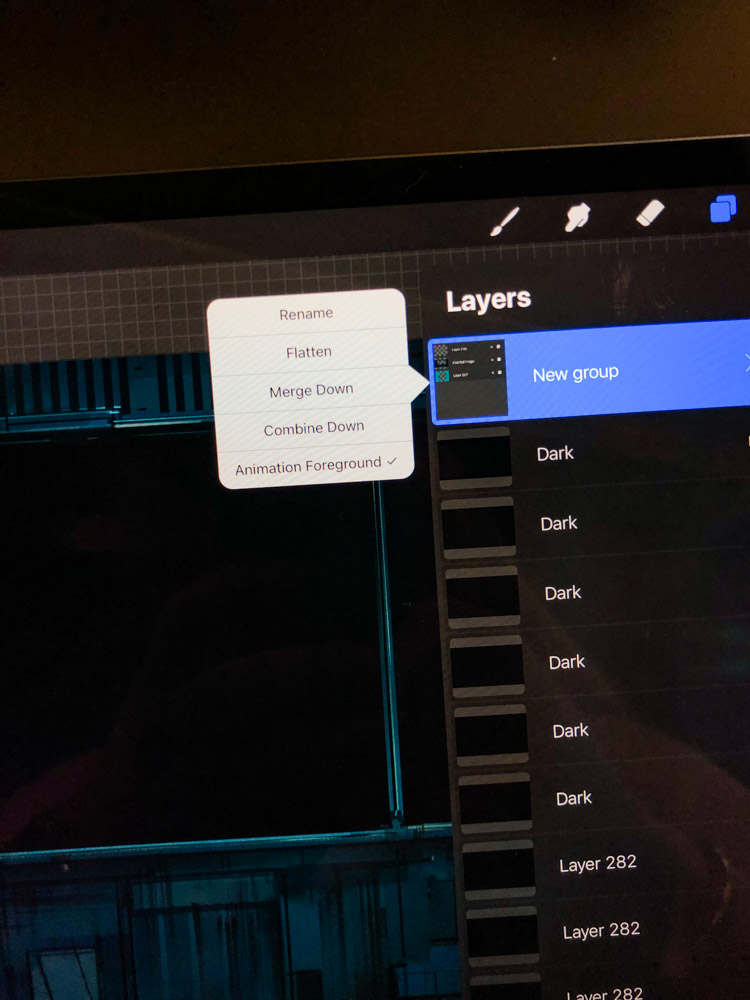
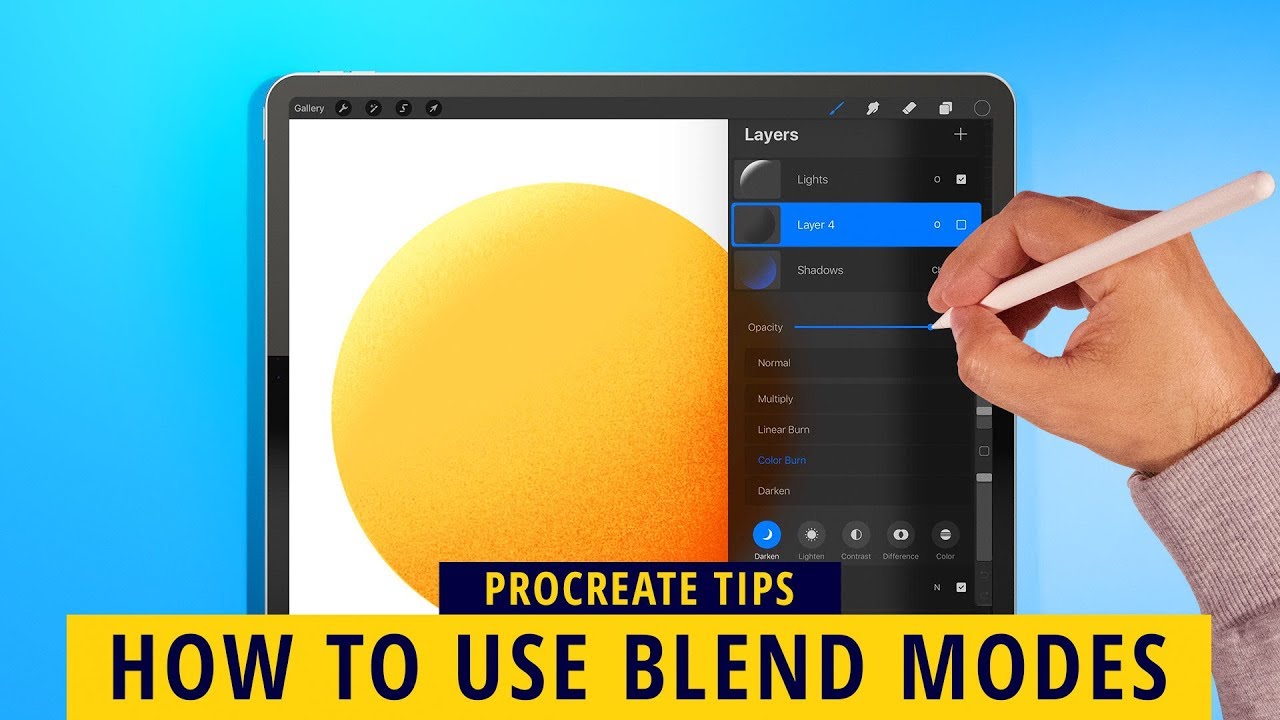
Learning how to blend in procreate can be challenging to figure out. Blending modes are important features that allow you to quickly edit your artwork and if you are a digital painter whether you use photoshop procreate or other digital painting software blending modes are a must have if you want to create a finished full illustration. First open the layers panel by tapping the double rectangle symbol in the top right of procreates interface.
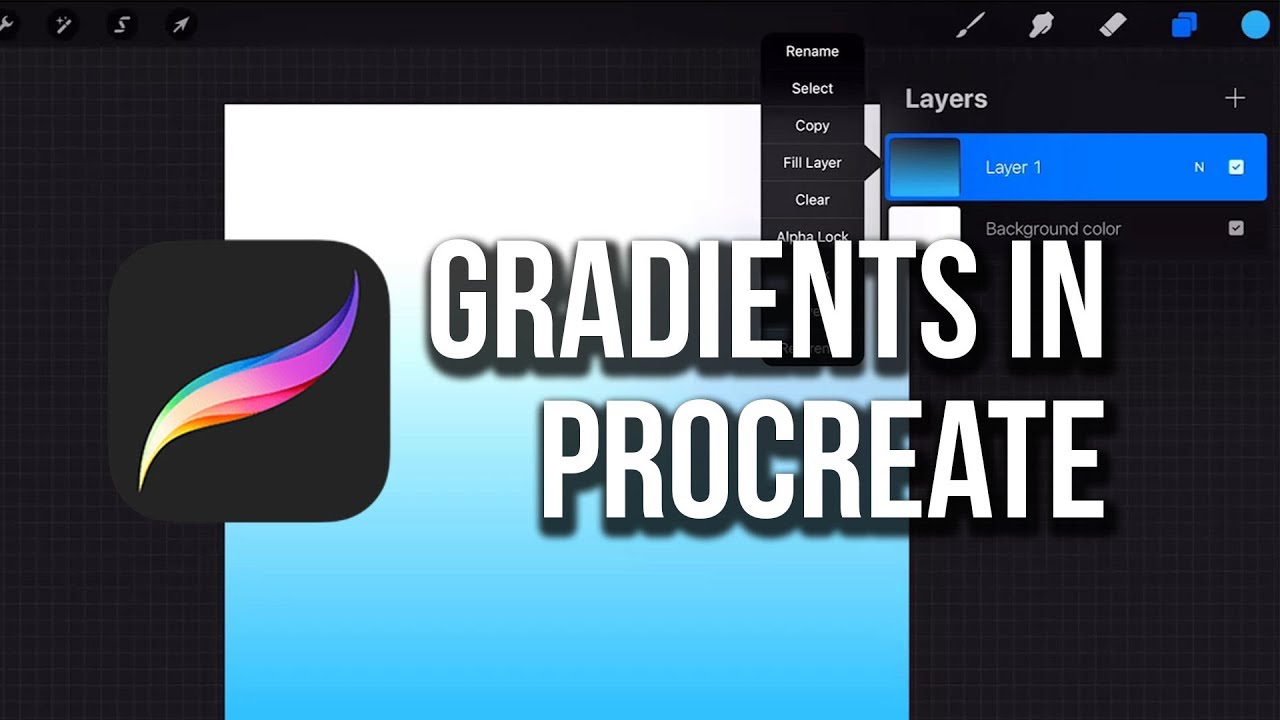
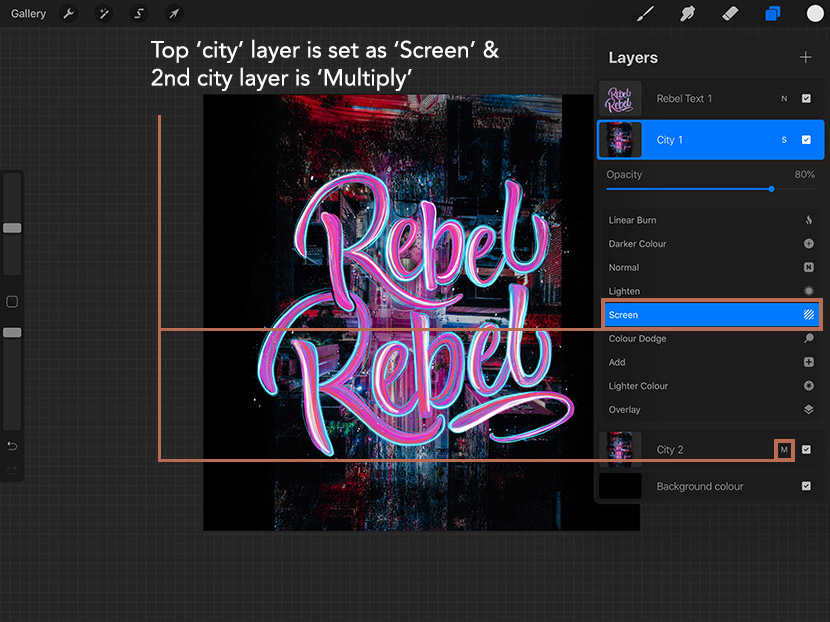
Check out the tips and tricks for getting a good effect. By default normal mode is active shown by the letter n. This is also a standard method used by lettering artists who work with procreate to create those beautiful gradient letters.
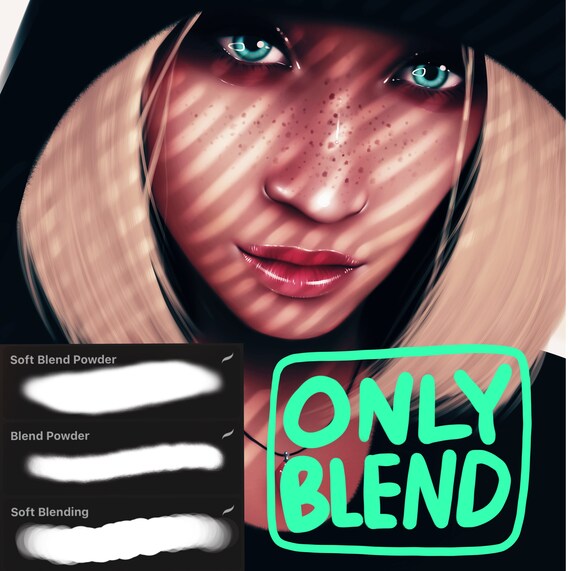
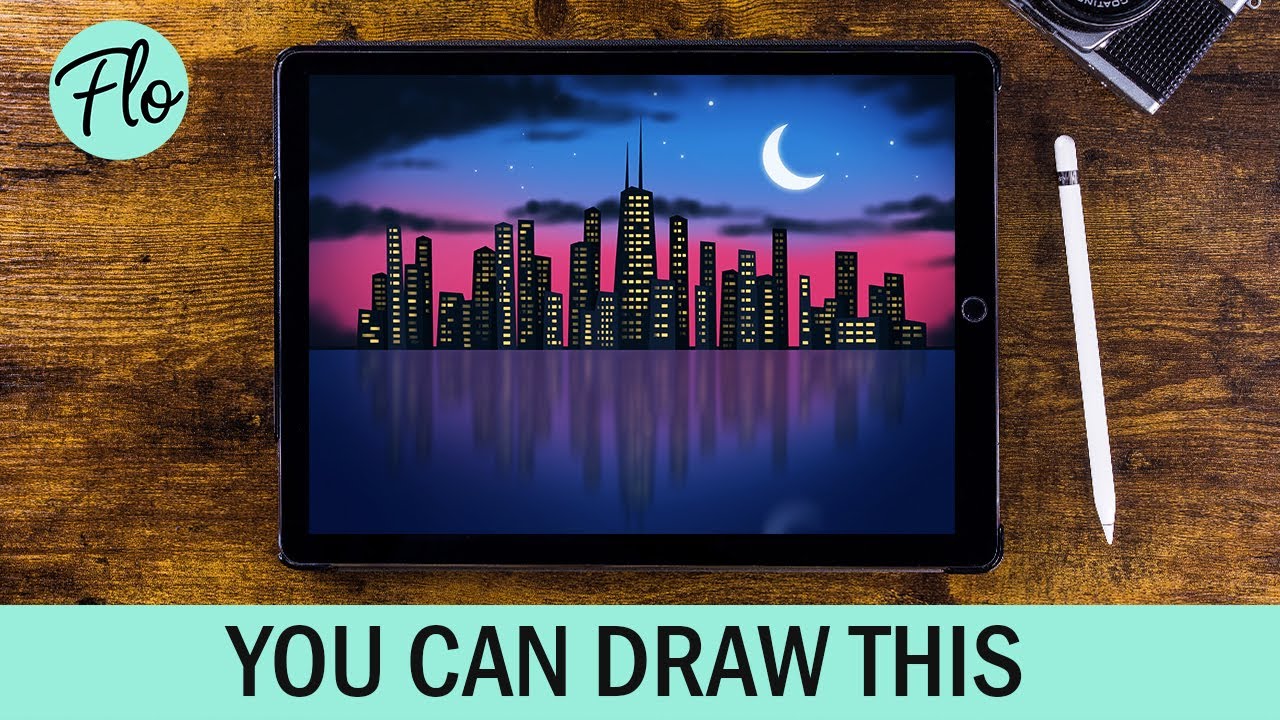
Some areas are more suitable to blend with a big brush and some areas need to be blended by using a smaller brushwhen you want a soft gradient in a larger area it is a good idea to make your blending brush big. In this video i will show you how to blend skin in procreate helping out my follower irene. Thats where i come in.
These tell you which blend mode is active on your layer. Vary the size of your brush.
Blending Colors In Procreate On Ipad Pro Youtube
www.youtube.com

How To Blend 10 Tips To Improve Your Blending In Procreate
artwithflo.com
3 Ways To Make Gradients In Procreate Youtube
www.youtube.com
Only Blend Brush Set Procreate Etsy
www.etsy.com

How To Create And Customize Procreate Brushes
design.tutsplus.com

How To Blend 10 Tips To Improve Your Blending In Procreate
artwithflo.com

Update Smudge Tool To Use 1 0 Gamma
folio.procreate.art

60 Of The Best Free Procreate Brushes Jae Johns
jaejohns.com

Procreate Blending Brushes By Itsywolf On Deviantart
www.deviantart.com
Artstation Procreate Advanced Blending Brushes Brushes
www.artstation.com

Https Encrypted Tbn0 Gstatic Com Images Q Tbn 3aand9gctwuqypsp86f8dwm4mzutci3uhgxur1jzd3mg Usqp Cau

How To Blend Colors In Procreate Youtube
m.youtube.com

Sculptor Like Brush
folio.procreate.art
Https Encrypted Tbn0 Gstatic Com Images Q Tbn 3aand9gcqvjttj1tvfuw5yy7ul5blnt7aywn Nxbvwkc9rx9u9pdzv4zs Usqp Cau
encrypted-tbn0.gstatic.com
How To Use Blending Modes In Procreate Ipad Calligraphy
ipadcalligraphy.com

How To Blend In Procreate Procreate Blending Brush Tutorial Youtube
www.youtube.com

Procreate Tutorial Colorful Blended Calligraphy Dawn Nicole
bydawnnicole.com
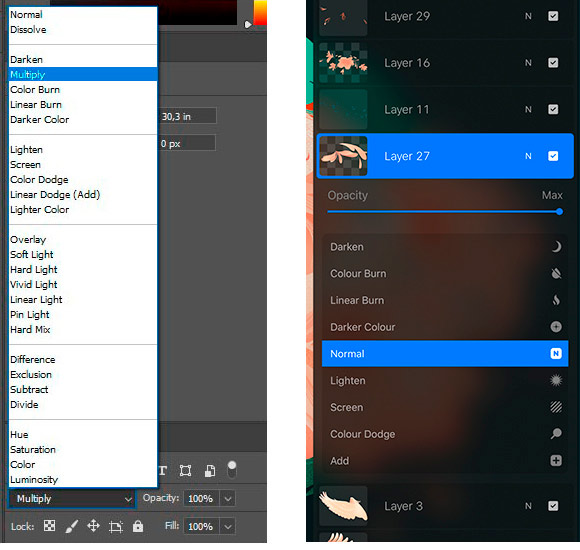
Working With Colors In Procreate Vs Photoshop Anniko Creative Designer Illustrator
annamystory.com

Blend Modes How To Blend Colors In Procreate Part 2 Applicable In Photoshop Funny Photoshop Photoshop Tutorial Graphics Photoshop Tutorial Advanced
www.pinterest.com

How To Use Procreate Layers
design.tutsplus.com
Drawing In Procreate Tutorial 7 7 Intro To Blending Modes Lettie Blue Skillshare
www.skillshare.com
How To Use Blending Modes In Procreate Ipad Calligraphy
ipadcalligraphy.com

How To Blend 10 Tips To Improve Your Blending In Procreate
artwithflo.com

Brushes Better Blending Capabilities
folio.procreate.art

Blender Brush Or Smudge Tool In Procreate On Ipad Pro Jspcreate
www.jspcreate.com

Brushes Better Blending Capabilities
folio.procreate.art
1
encrypted-tbn0.gstatic.com

How To Use Procreate Layers
design.tutsplus.com
Https Encrypted Tbn0 Gstatic Com Images Q Tbn 3aand9gctmjkdw8fatehabh J76hhexidpfze2b3tzp6lwqaukrgubuy3d Usqp Cau
encrypted-tbn0.gstatic.com

Blender Brushes For Procreate Blend And Smudge Set Of 30 Brushes Ipad Apple Pencil Procreate App Tutorial Procreate Brushes Procreate
www.pinterest.com

Haze Long Procreate Smudge Brushes
gumroad.com
How To Blend In Procreate 5 Youtube
www.youtube.com
Procreate 5 Tutorial Review Everything New How To Use It
bardotbrush.com
Remove Backgrounds Easily With Blending Modes Ipad Calligraphy
ipadcalligraphy.com

How To Blend 10 Tips To Improve Your Blending In Procreate
artwithflo.com

How To Blend In Procreate Procreate Blending Brush Tutorial Youtube In 2020 Procreate Ipad Tutorials Procreate Ipad Art Procreate App Tutorial
www.pinterest.com

Brushes Better Blending Capabilities
folio.procreate.art

Art With Flo A Short Video On Blending Colors In The App
www.facebook.com

How To Blend 10 Tips To Improve Your Blending In Procreate
artwithflo.com

How To Use Blending Modes In Procreate Ipad Calligraphy
ipadcalligraphy.com

How To Blend Skin In Procreate Sharing Your Artwork Patreon And More Youtube
www.youtube.com

Paint Blend Brushes For Procreate
folio.procreate.art

Free Salt Brushes For Procreate Krystal Higgins
www.kryshiggins.com

Https Encrypted Tbn0 Gstatic Com Images Q Tbn 3aand9gcr1uaeyi Gs7vyi2rt Pwpqqdqew 0y6fpsda Usqp Cau

The Smudge Tool Has Been Redesigned And Greatly Improved In Procreate 4 So I Thought I Would Create A Set Of Brushes Procreate Brushes Free Smudging Procreate
www.pinterest.com

Blender Brush Or Smudge Tool In Procreate On Ipad Pro Jspcreate
www.jspcreate.com

Https Encrypted Tbn0 Gstatic Com Images Q Tbn 3aand9gcr Hbdn8uvp9hfl0aq18 Pzskkz3zngb0crww Usqp Cau

Blending Colors In Procreate And Ipad Pro Youtube
www.youtube.com
Blender Brushes For Procreate Blend And Smudge Set Of 30 Etsy
www.etsy.com

Https Encrypted Tbn0 Gstatic Com Images Q Tbn 3aand9gct9fpyfu1nmggkqbnfpy8hmloi Sazcx5ip8a Usqp Cau

Learning To Blend On Procreate Learntodraw
www.reddit.com

10 Procreate App Tips For Budding Ipad Artists Cnet
www.cnet.com
Amazing Blend Brush Free Brushes For Procreate
procreate.brushes.work

How To Blend In Procreate 5 App Cate Shaner Blog
cateshaner.com

How To Import And Export Brush Sets In Procreate Pocket 2 Procreate Insight
procreate.art

How To Blend Colors In Procreate Without The Apple Pencil Join The Creative Side
www.jointhecreativeside.com

Procreate 5 Updates For Hand Lettering And Calligraphy Loveleigh Loops In 2020 Procreate Lettering Procreate Ipad Procreate Ipad Pro
www.pinterest.com

Brushes Better Blending Capabilities
folio.procreate.art

Blend All Layers
folio.procreate.art
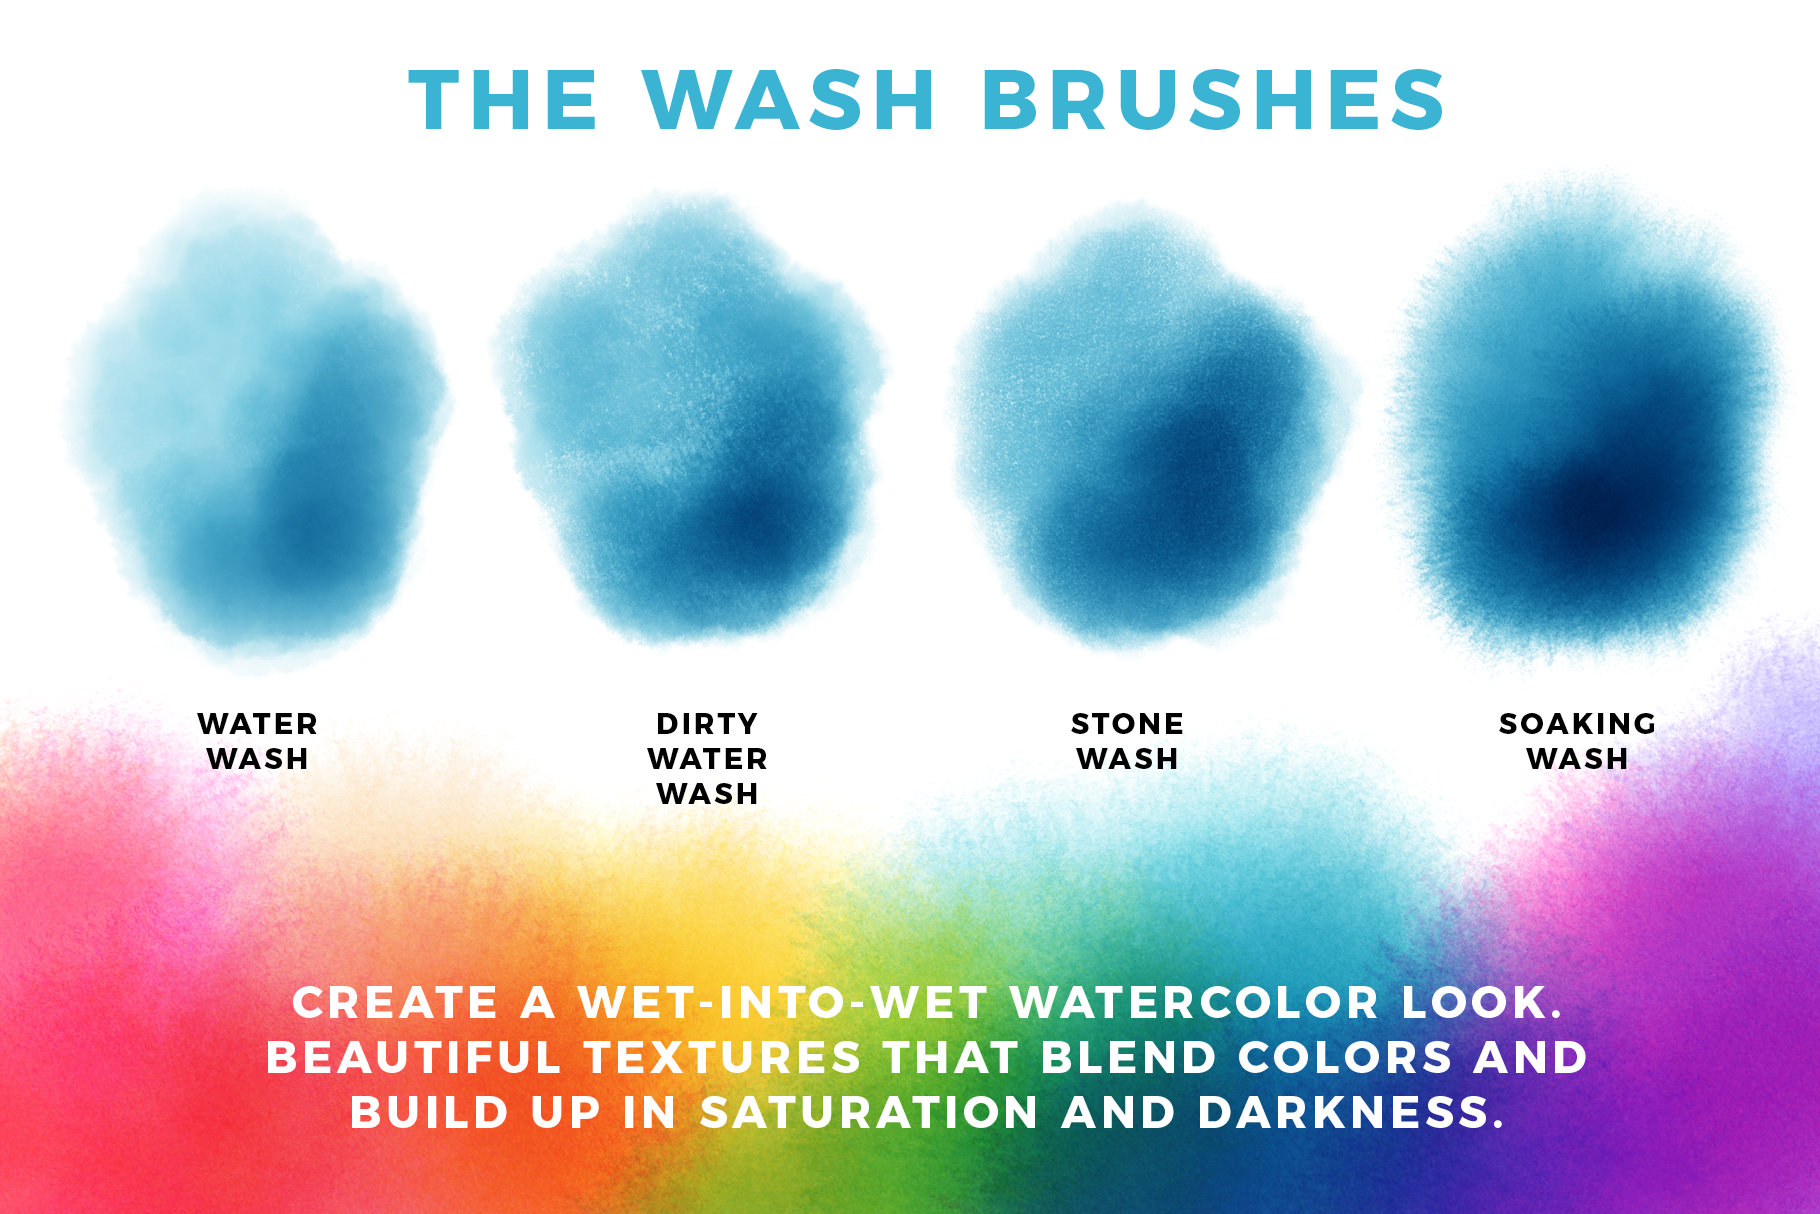
Wash Dry Watercolor Brushes For Procreate Bardot Brush
bardotbrush.com

Update Smudge Tool To Use 1 0 Gamma
folio.procreate.art

All About The Procreate 5 Brush Studio Ebb And Flow Creative Co
ebbandflowcc.com

Blender Brushes For Procreate Ipad Lettering Procreate Procreate Ipad Art Procreate App Tutorial
www.pinterest.com

Blender Brush Or Smudge Tool In Procreate On Ipad Pro Jspcreate
www.jspcreate.com

How To Use Procreate Layers
design.tutsplus.com

How To Use Procreate Layers
design.tutsplus.com

Blender Brush Or Smudge Tool In Procreate On Ipad Pro Jspcreate
www.jspcreate.com

Blending Brushes For Procreate Design Cuts
www.designcuts.com
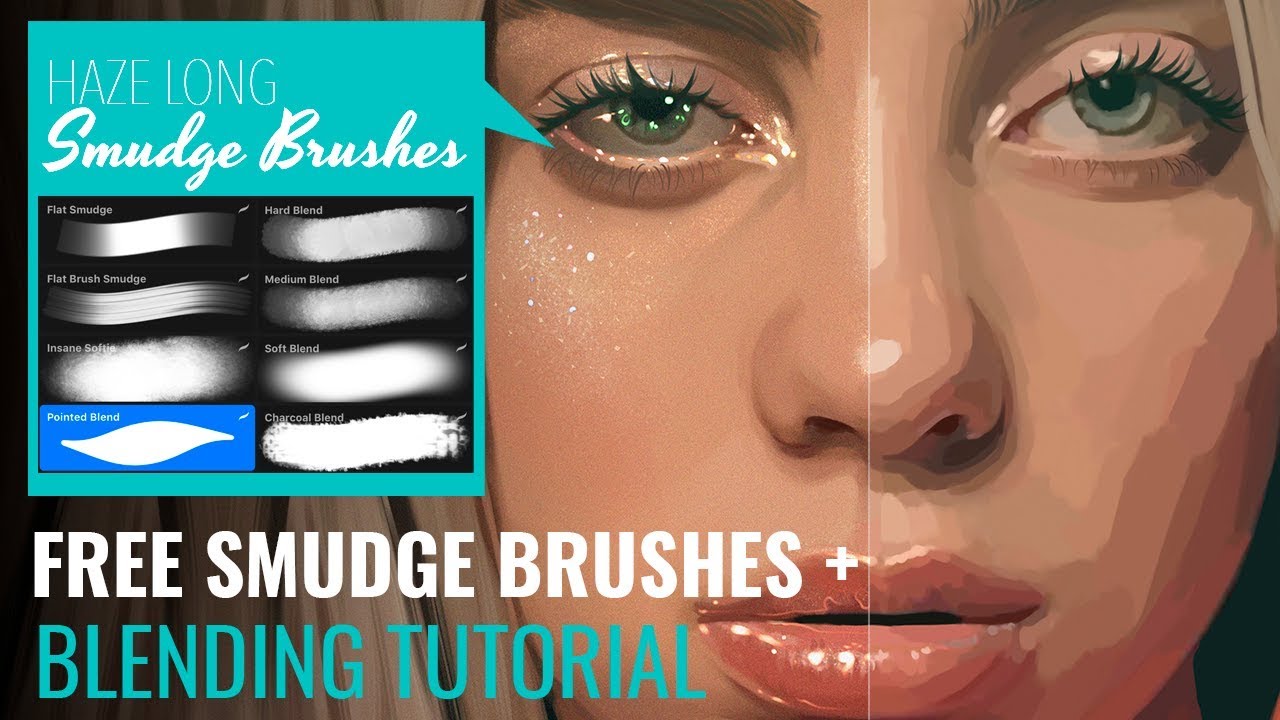
Smudge Brush Set Procreate Blending Tutorial By Haze Long Youtube
www.youtube.com

60 Of The Best Free Procreate Brushes Jae Johns
jaejohns.com

How To Blend Colors Easily In Procreate 1 Fill The Canvas With One Color You Can Do This By Choosing The In 2020 Lettering Guide How To Do Calligraphy Lettering
www.pinterest.com
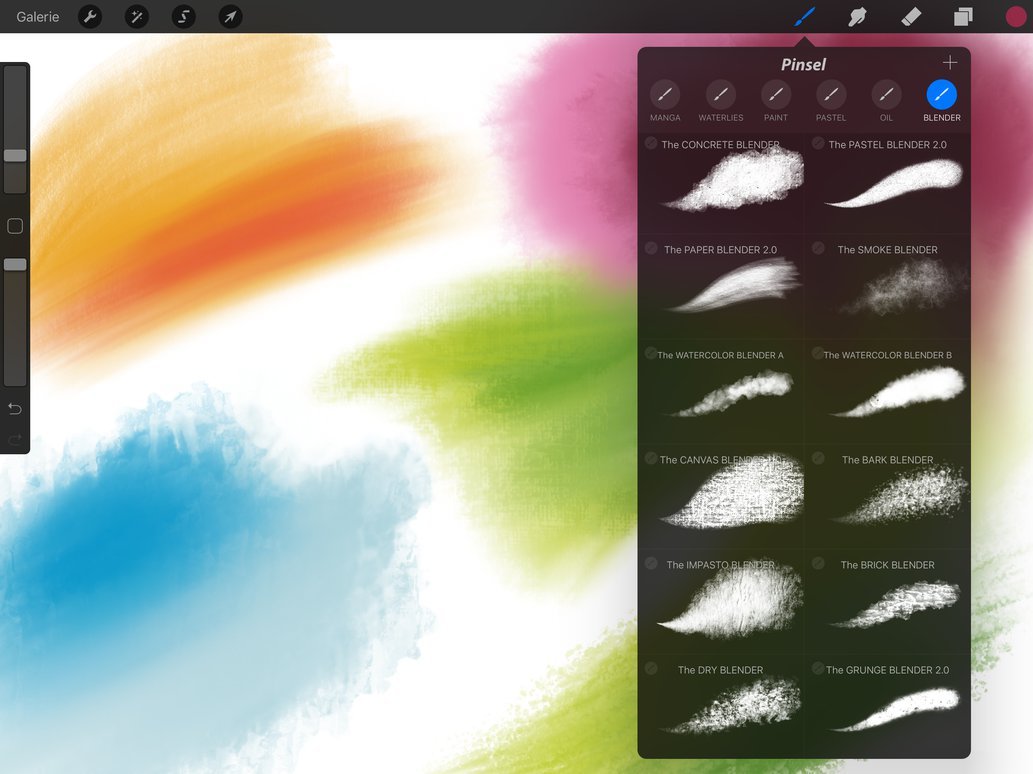
Georg S Procreate Brushes Procreate Blender Brushes Watercolor Oil Paint
procreate-brushes.com

How To Blend 10 Tips To Improve Your Blending In Procreate
artwithflo.com

Https Encrypted Tbn0 Gstatic Com Images Q Tbn 3aand9gcquwhevye D5ymjw Rjdzxgb64xii2fjkaz0g Usqp Cau
How To Blend In Procreate 5 Youtube
www.youtube.com

How To Blend Colors In Procreate For Ipad Without The Apple Pencil Tutorial Youtube
www.youtube.com

Blender Brush Or Smudge Tool In Procreate On Ipad Pro Jspcreate
www.jspcreate.com

How To Use Procreate Layers
design.tutsplus.com
10 Free Premium Procreate Blending Brushes Rate Reviewed
delightfuldesignstudio.com

Brushes Better Blending Capabilities
folio.procreate.art

Georg S Procreate Brushes Free Blending Sculptor Brushes Hi There Just
procreate-brushes.com

Blending Colours
folio.procreate.art
Procreate Brushes Procreate Stamps Procreate Painting Etsy
www.etsy.com
How To Use Blend Modes In Procreate Youtube
www.youtube.com

Procreate Tip Organize Your Brushes By Project Learn With Steph Fizer Coleman Procreate Tutorial Procreate Procreate Brushes
www.pinterest.com
Ipad Lettering For Beginners How To Use Procreate 2020 Lettering Daily
www.lettering-daily.com

10 Tips For Better Blending In Procreate Procreate Tutorial Procreate Digital Art Tutorial
www.pinterest.com
3
encrypted-tbn0.gstatic.com
24 Procreate Blender Brushes For Watercolor Pastel Georg S Procreate Brushes
sellfy.com

Https Encrypted Tbn0 Gstatic Com Images Q Tbn 3aand9gcttt M8zbssiq6uhhilo6n0qqkqqaxyjsalhg Usqp Cau
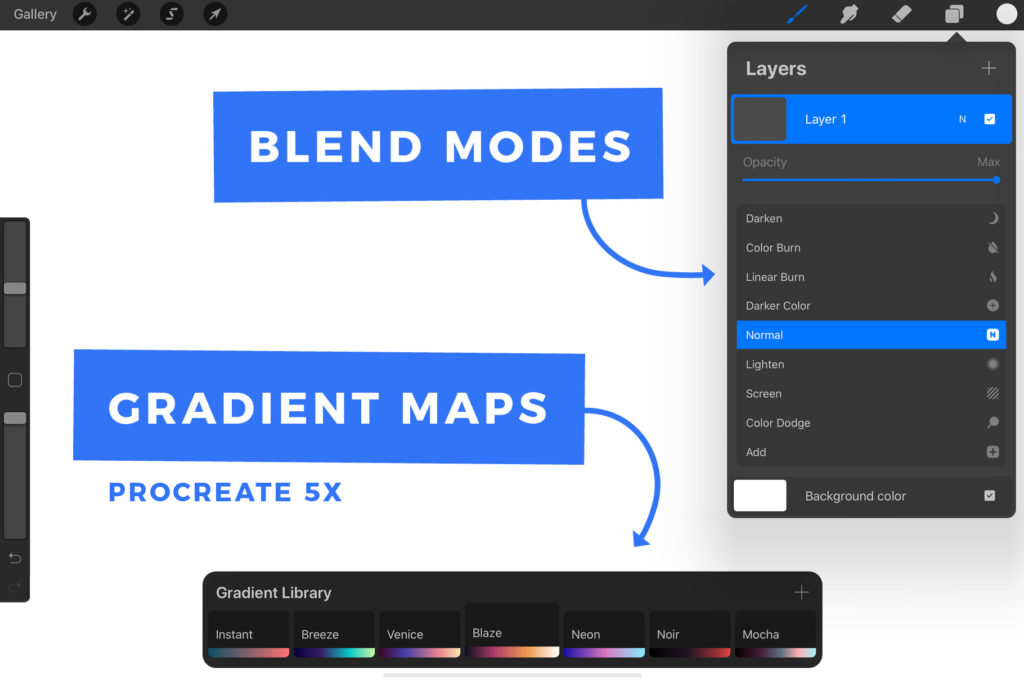
Procreate 5x Color Play Gradient Maps Blend Modes Bardot Brush
bardotbrush.com

Procreate 4 For Ipad Review Stuff
www.stuff.tv
How To Create And Use Your Own Blender Brush In Procreate On The Ipad Pro Youtube
m.youtube.com
Procreate Alternatives And Similar Apps Alternativeto Net
alternativeto.net

How To Blend 10 Tips To Improve Your Blending In Procreate
artwithflo.com

How To Blend In Procreate Archives Hildur K O
hildurko.com

Procreate How To Blend Colours Youtube
www.youtube.com
10 Tips For Better Blending In Procreate Youtube
www.youtube.com