
How To Cut And Print On Cricut

How To Print And Cut Stickers With A Cricut Well Crafted Studio
wellcraftedstudio.com
Cricut Design Space Us Craft Blog The Crafty Blog Stalker
thecraftyblogstalker.com
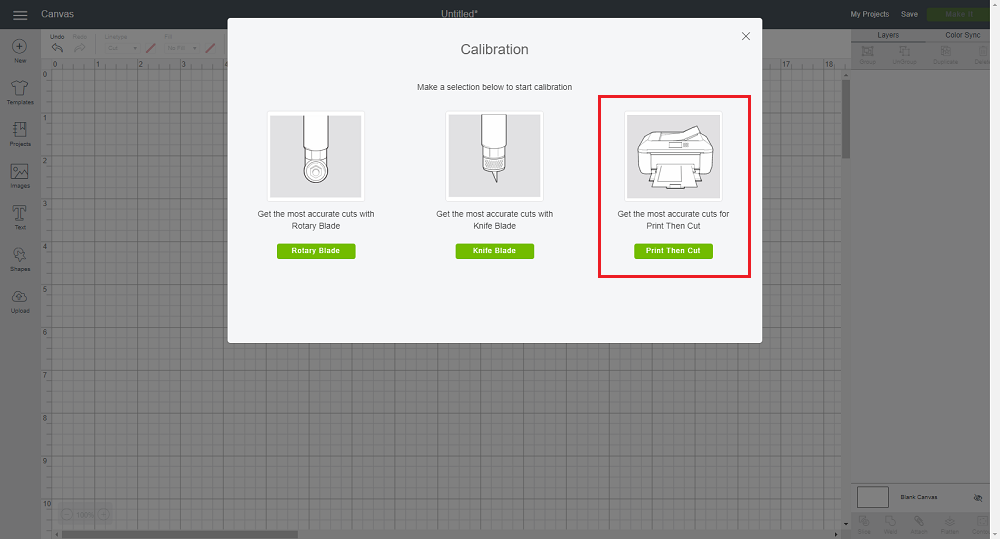
Calibrating Your Machine For Print Then Cut Help Center
help.cricut.com
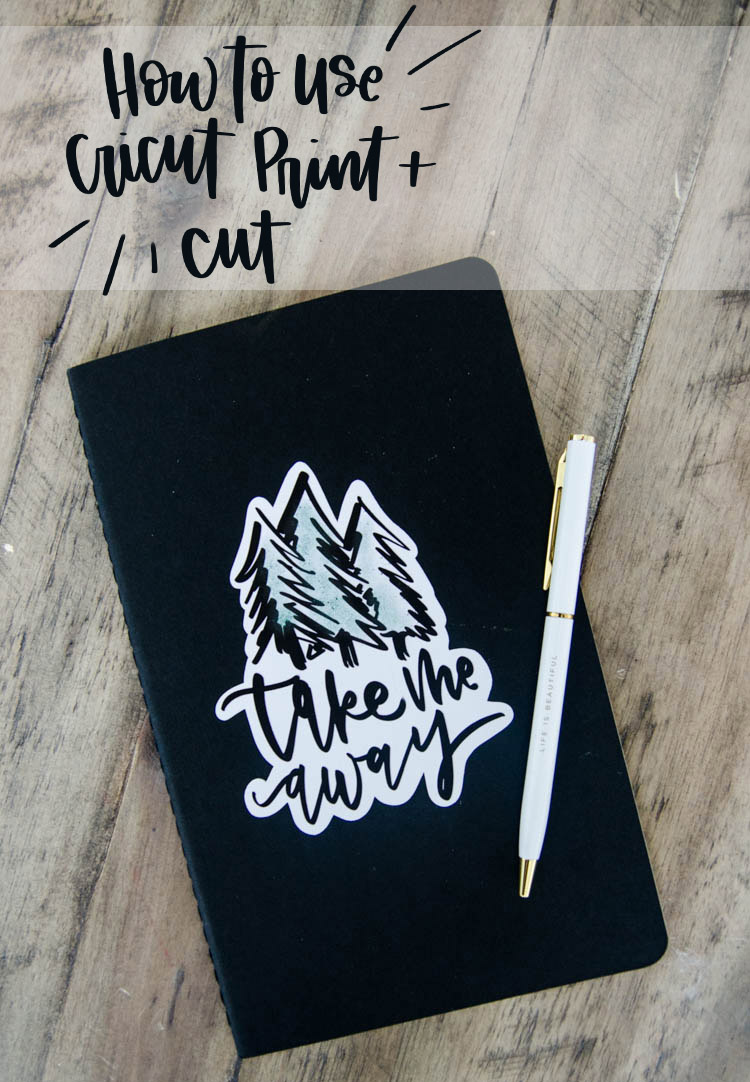
How To Print Then Cut With A Cricut Machine The Kim Six Fix
www.thekimsixfix.com

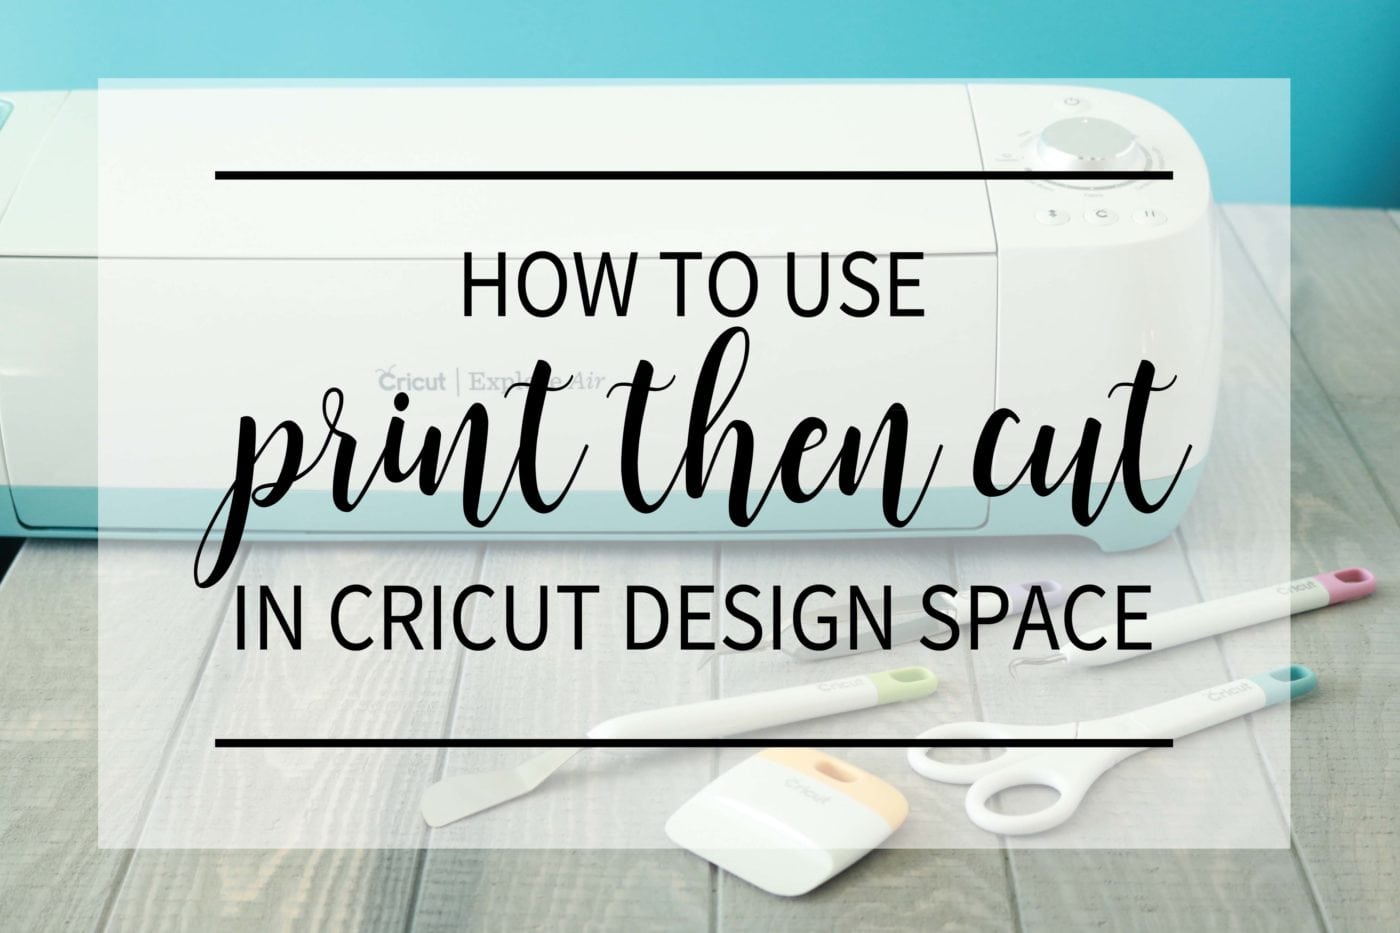
How To Use Print Then Cut On The Cricut And 35 Ideas To Make Youtube
www.youtube.com
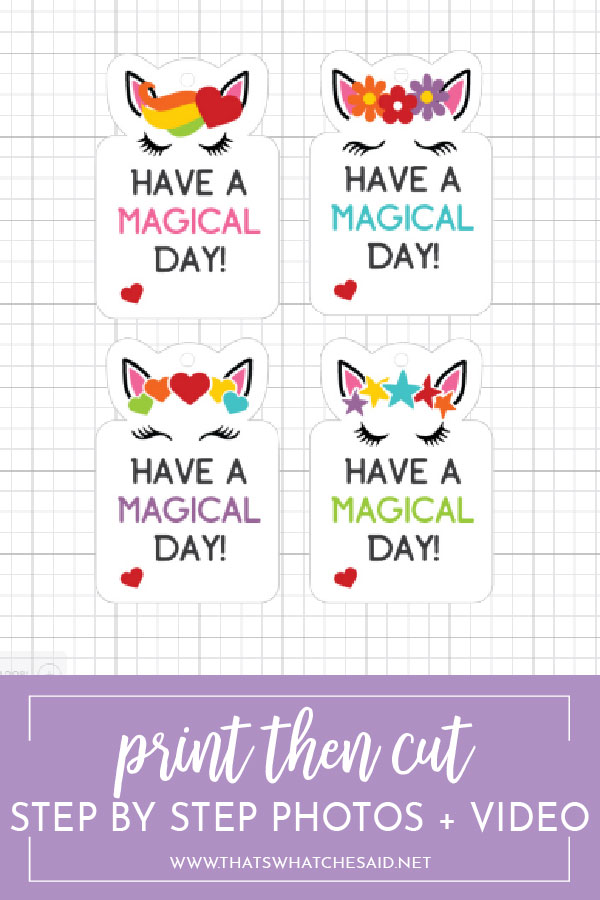
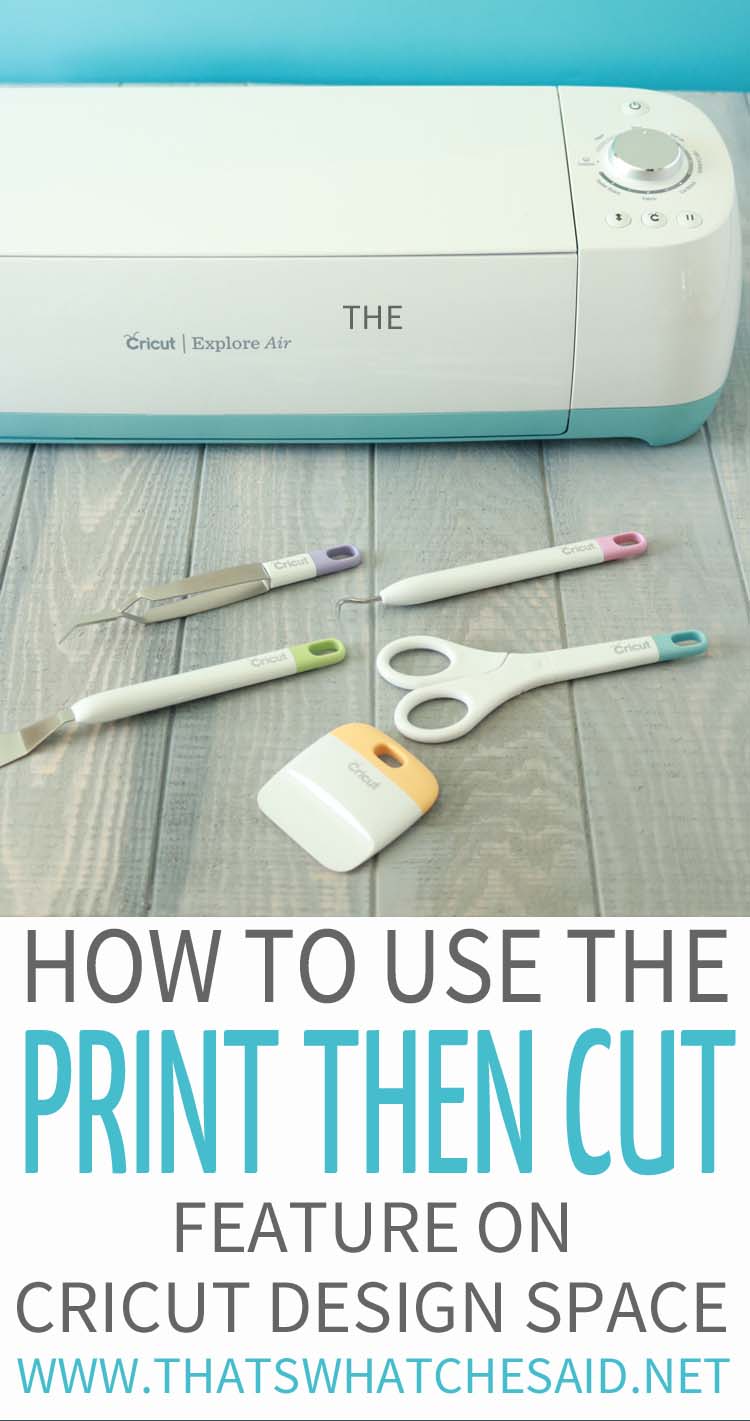
How To Use Print Then Cut Feature Using Cricut Design Space
www.thatswhatchesaid.net
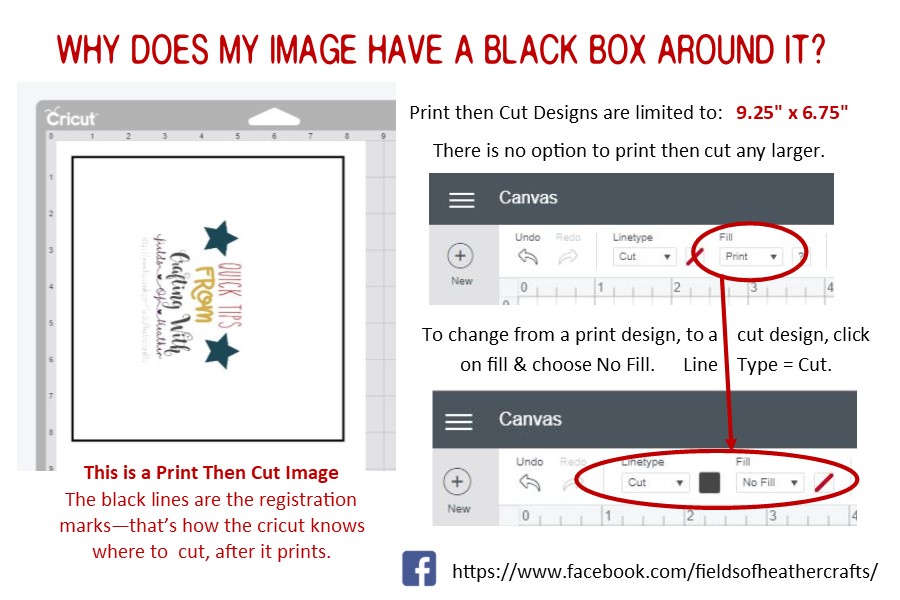
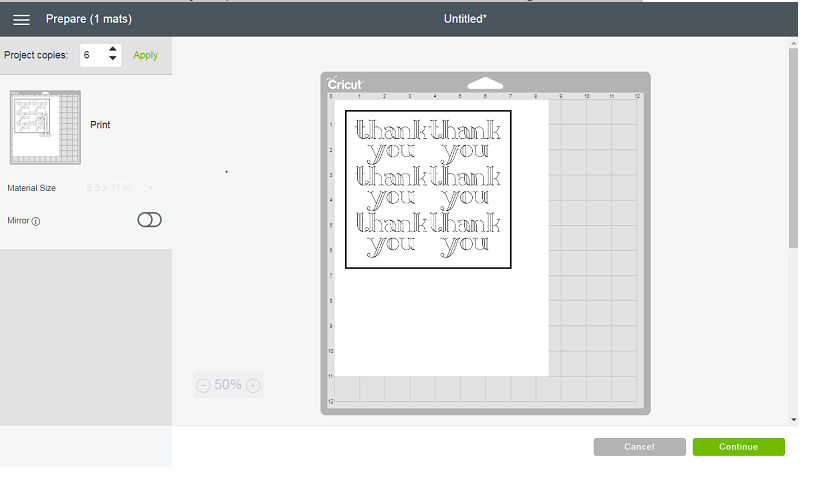
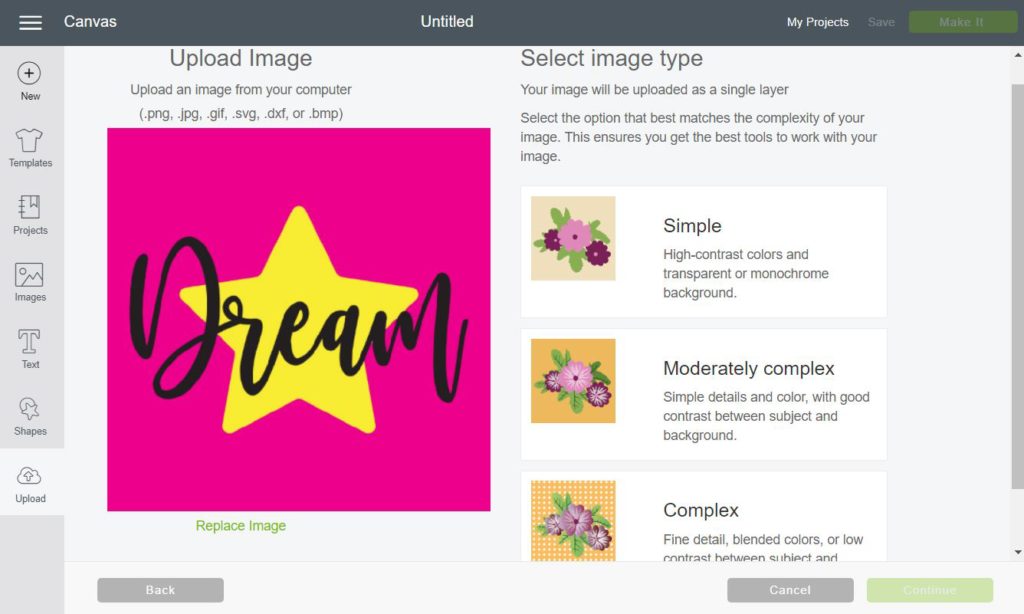
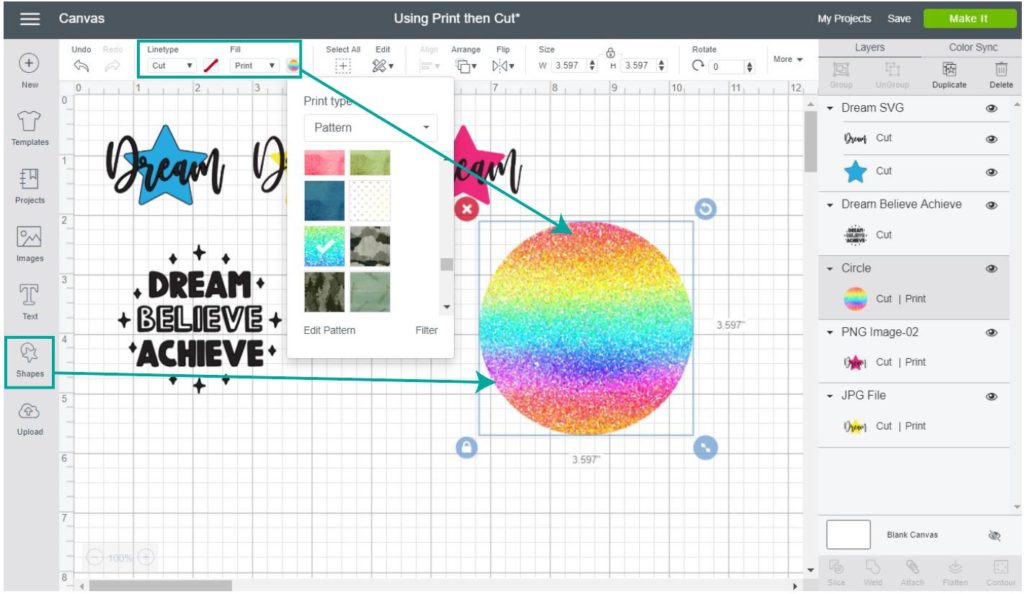
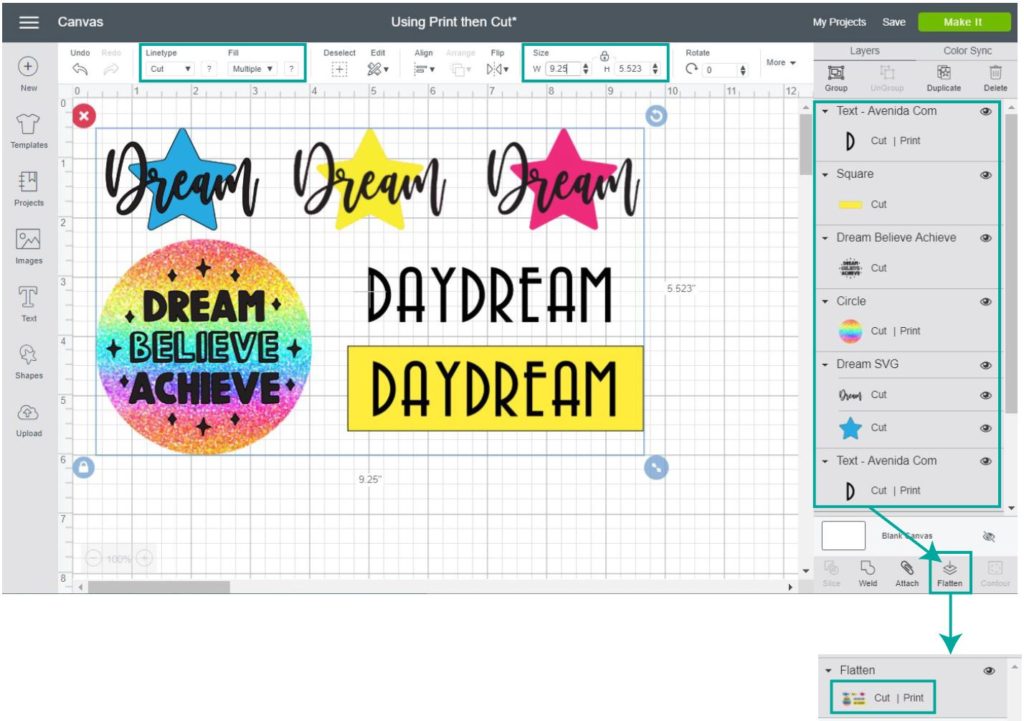
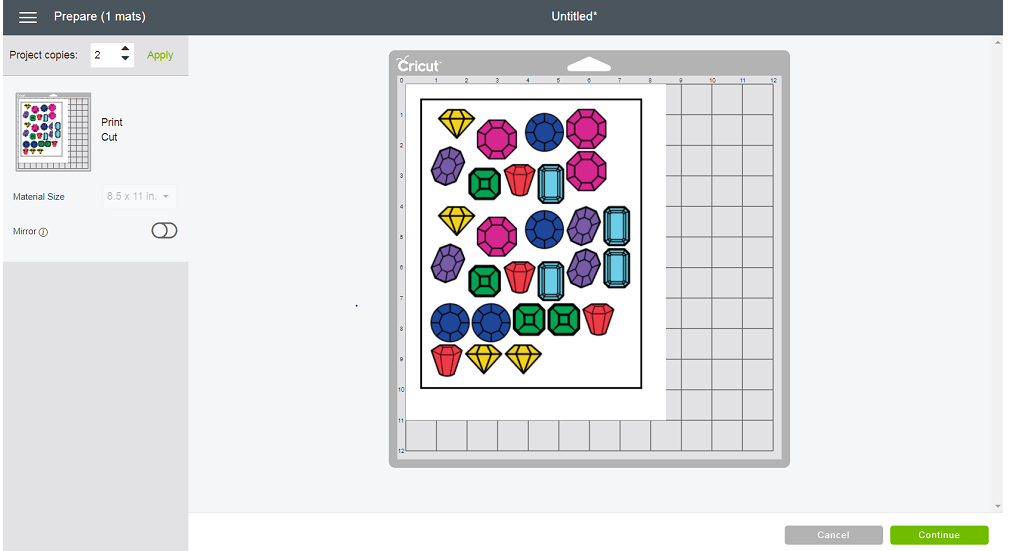
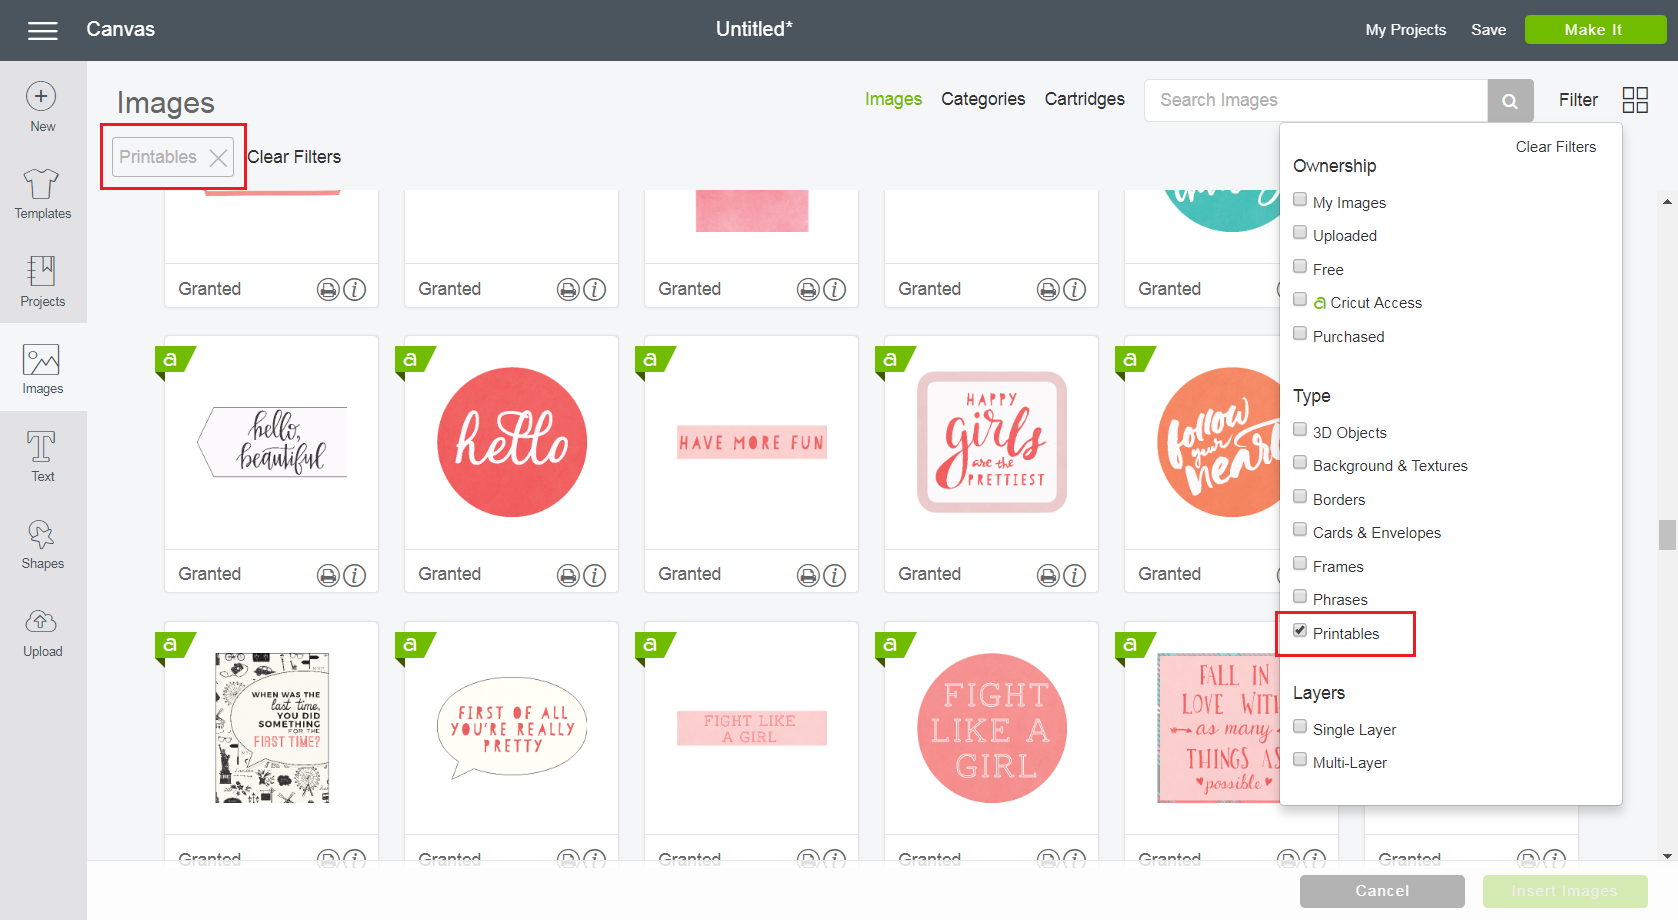
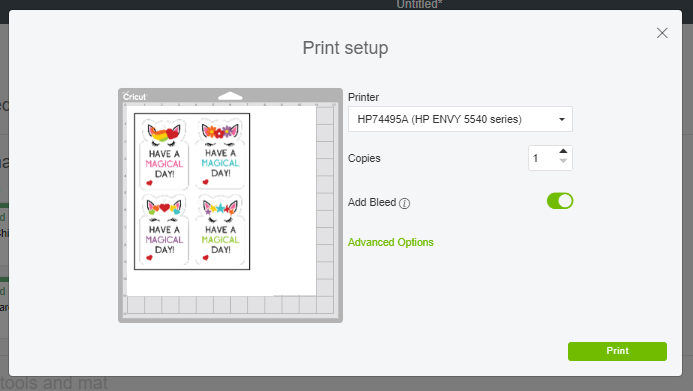
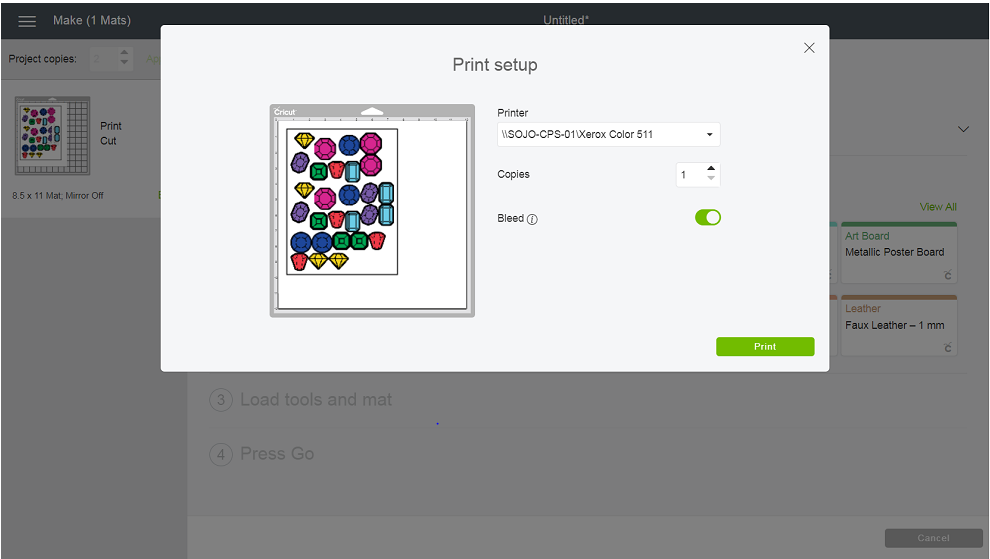
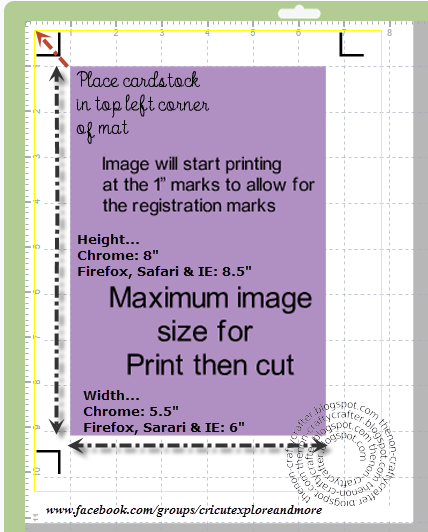
The maximum image size for print then cut is 925 x 675 and the default material is 85 x 11.

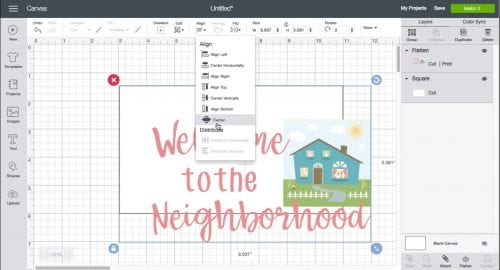
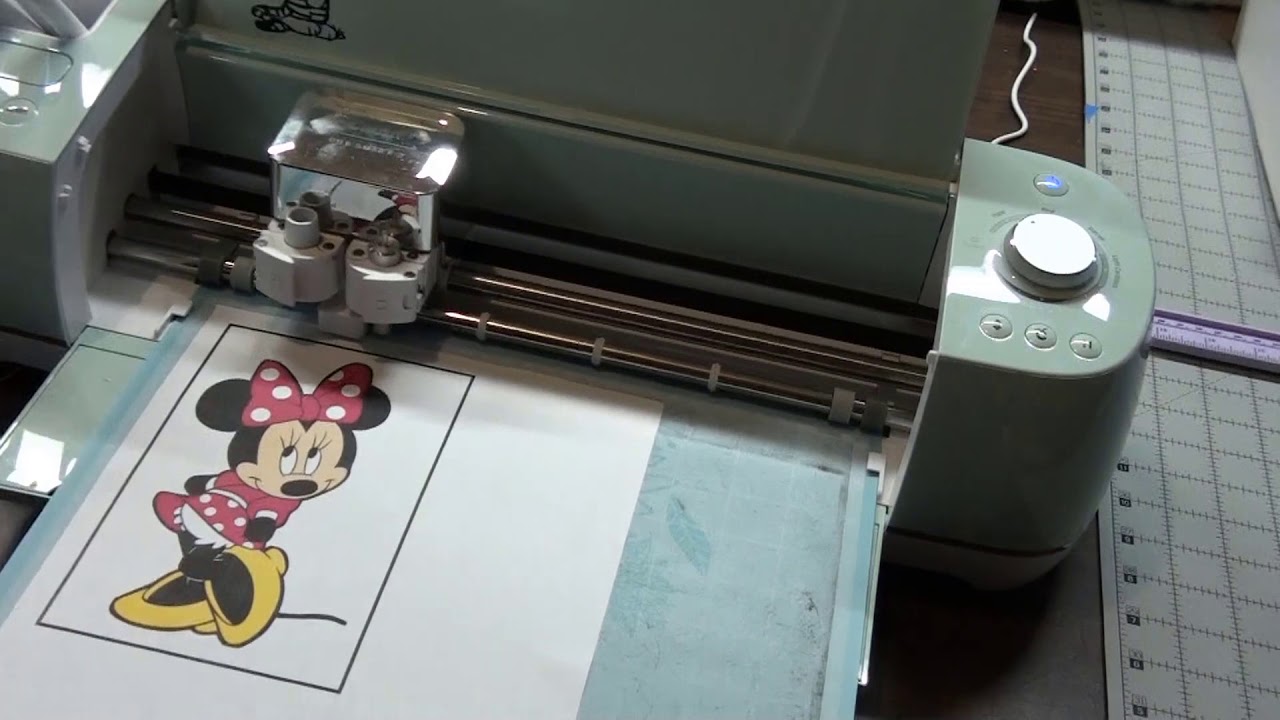
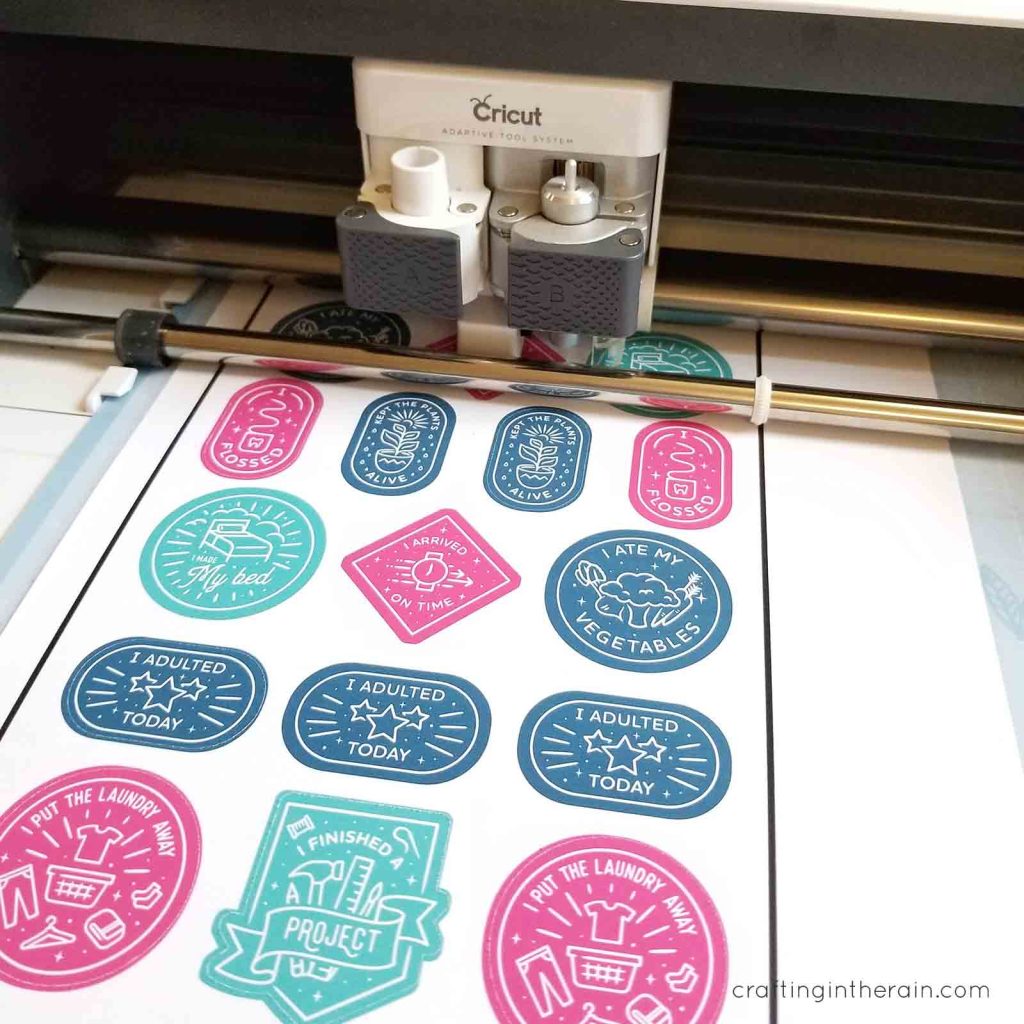
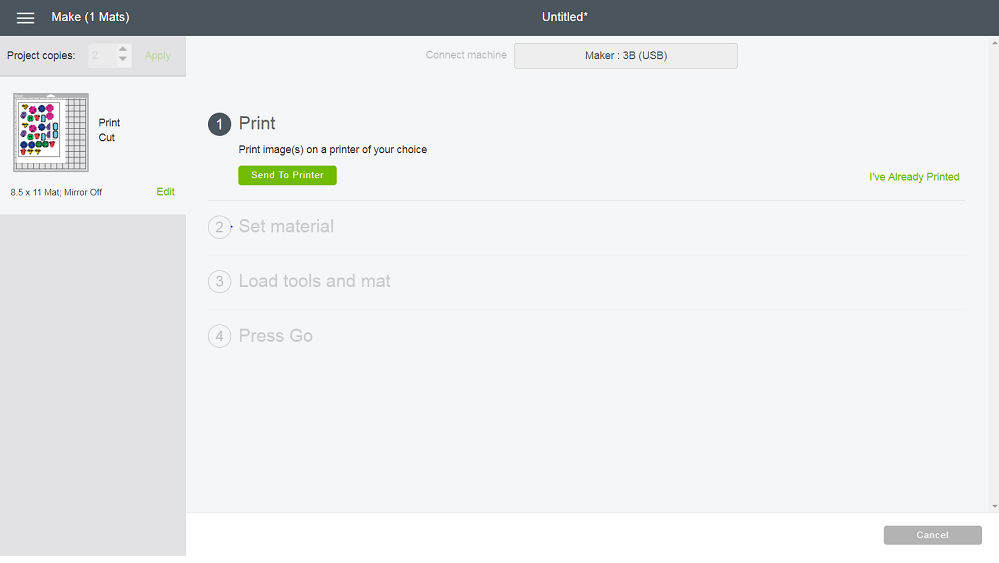
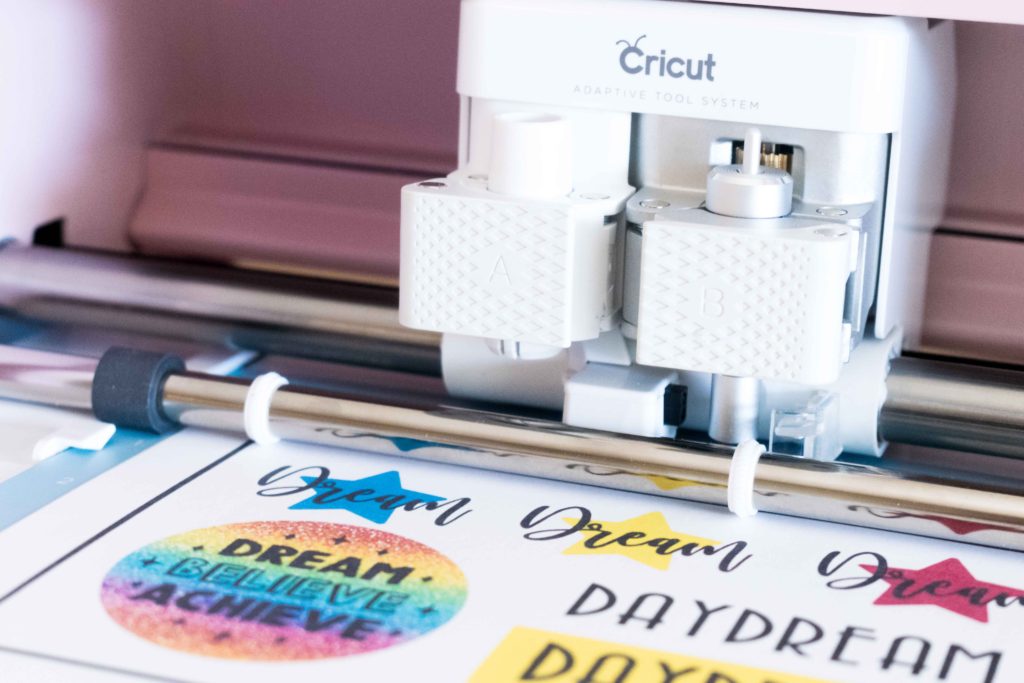
How to cut and print on cricut. Learn how to print then cut with your cricut in this easy tutorial. Center the image and shape and with both. Design space will send it to your home printer first and then it will cut it.
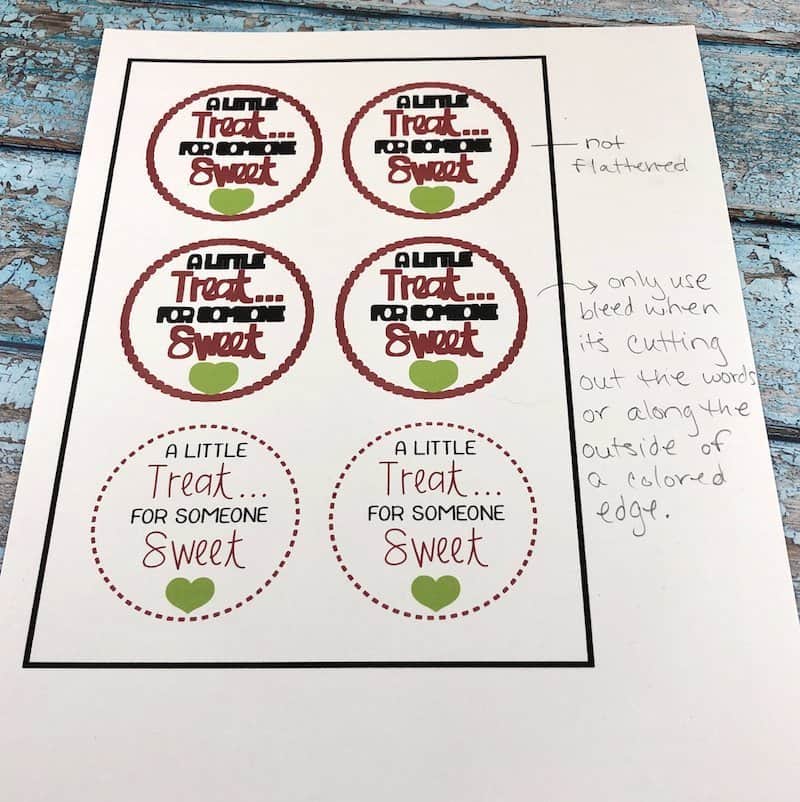
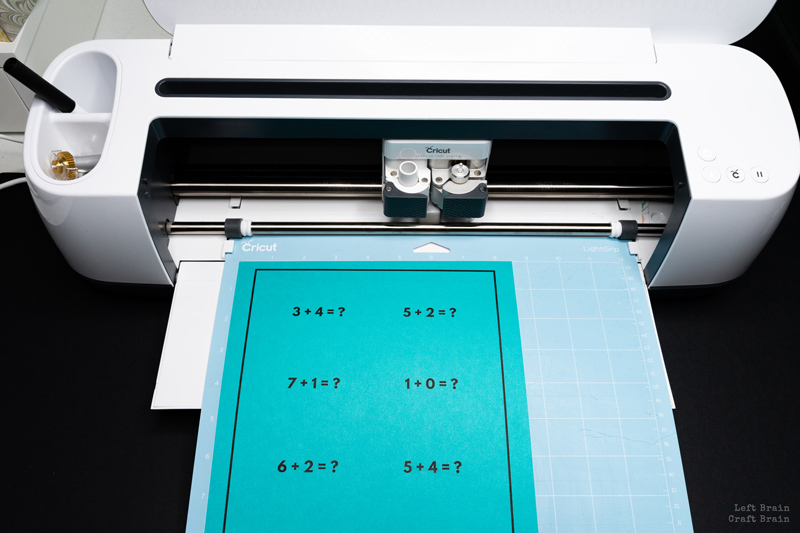
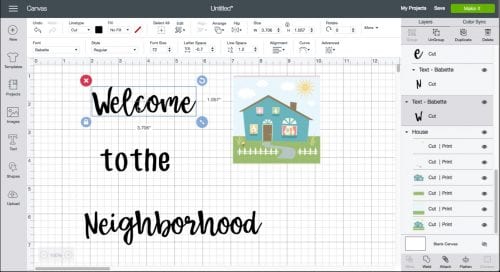
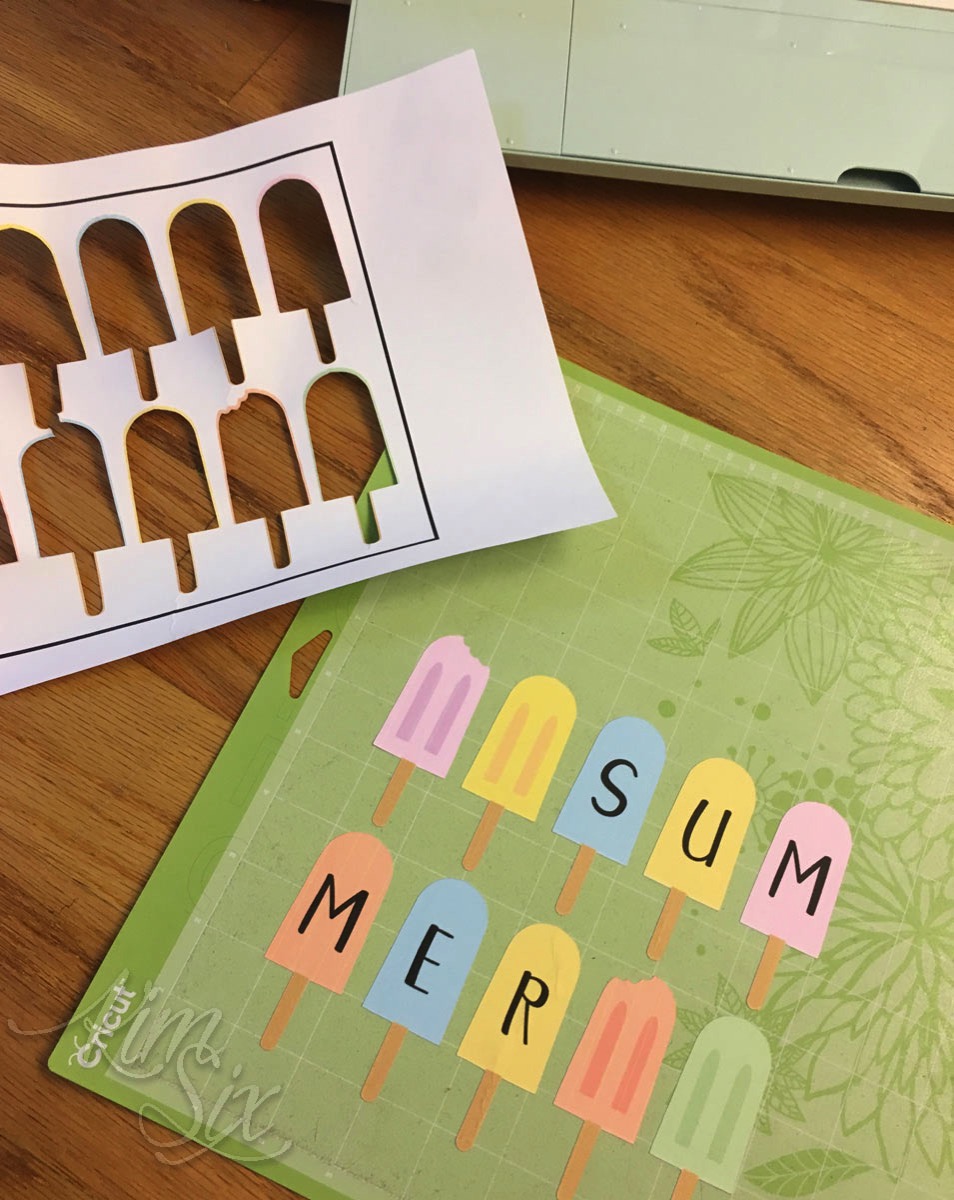
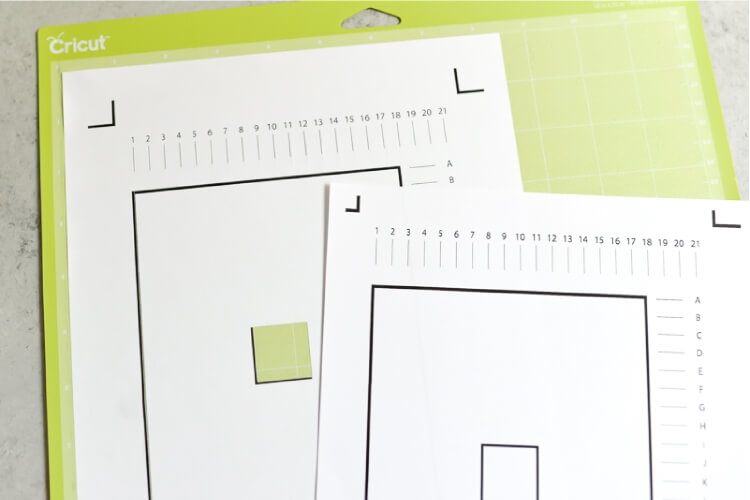
Line up the cut paper from your cricut over the top of the printed design on the copy paper. Print the page using your home printer then place the paper on the cricut cutting mat and feed it to the cricut machine. If the image has words place a square or circle behind it a little bit bigger than the image to give it a border.
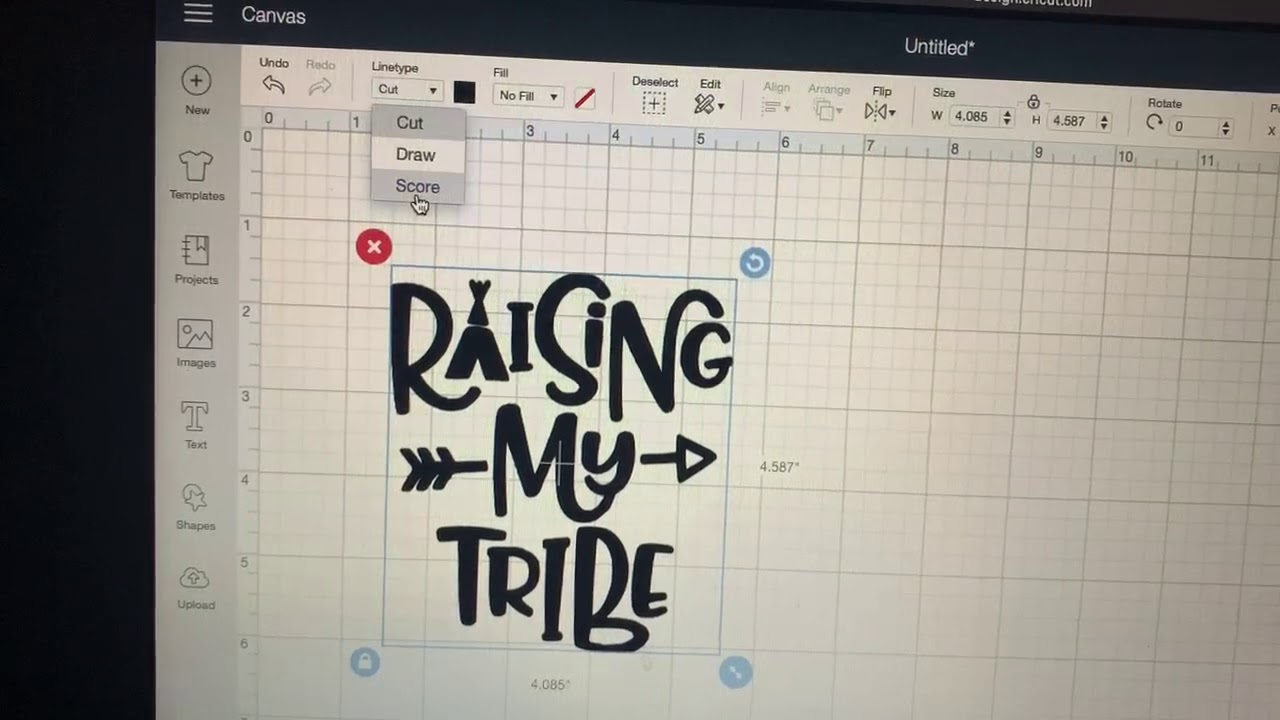
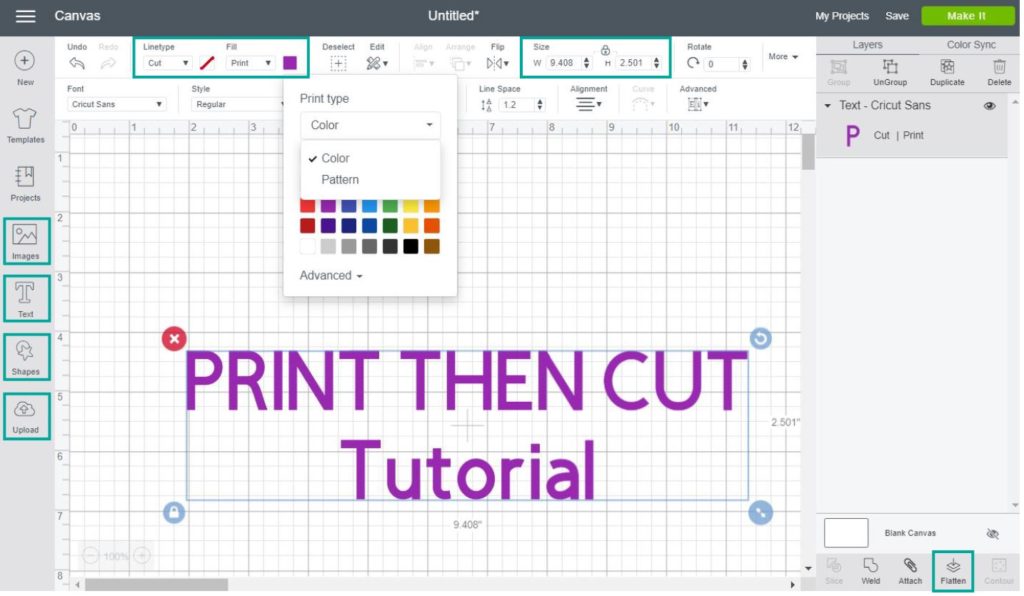
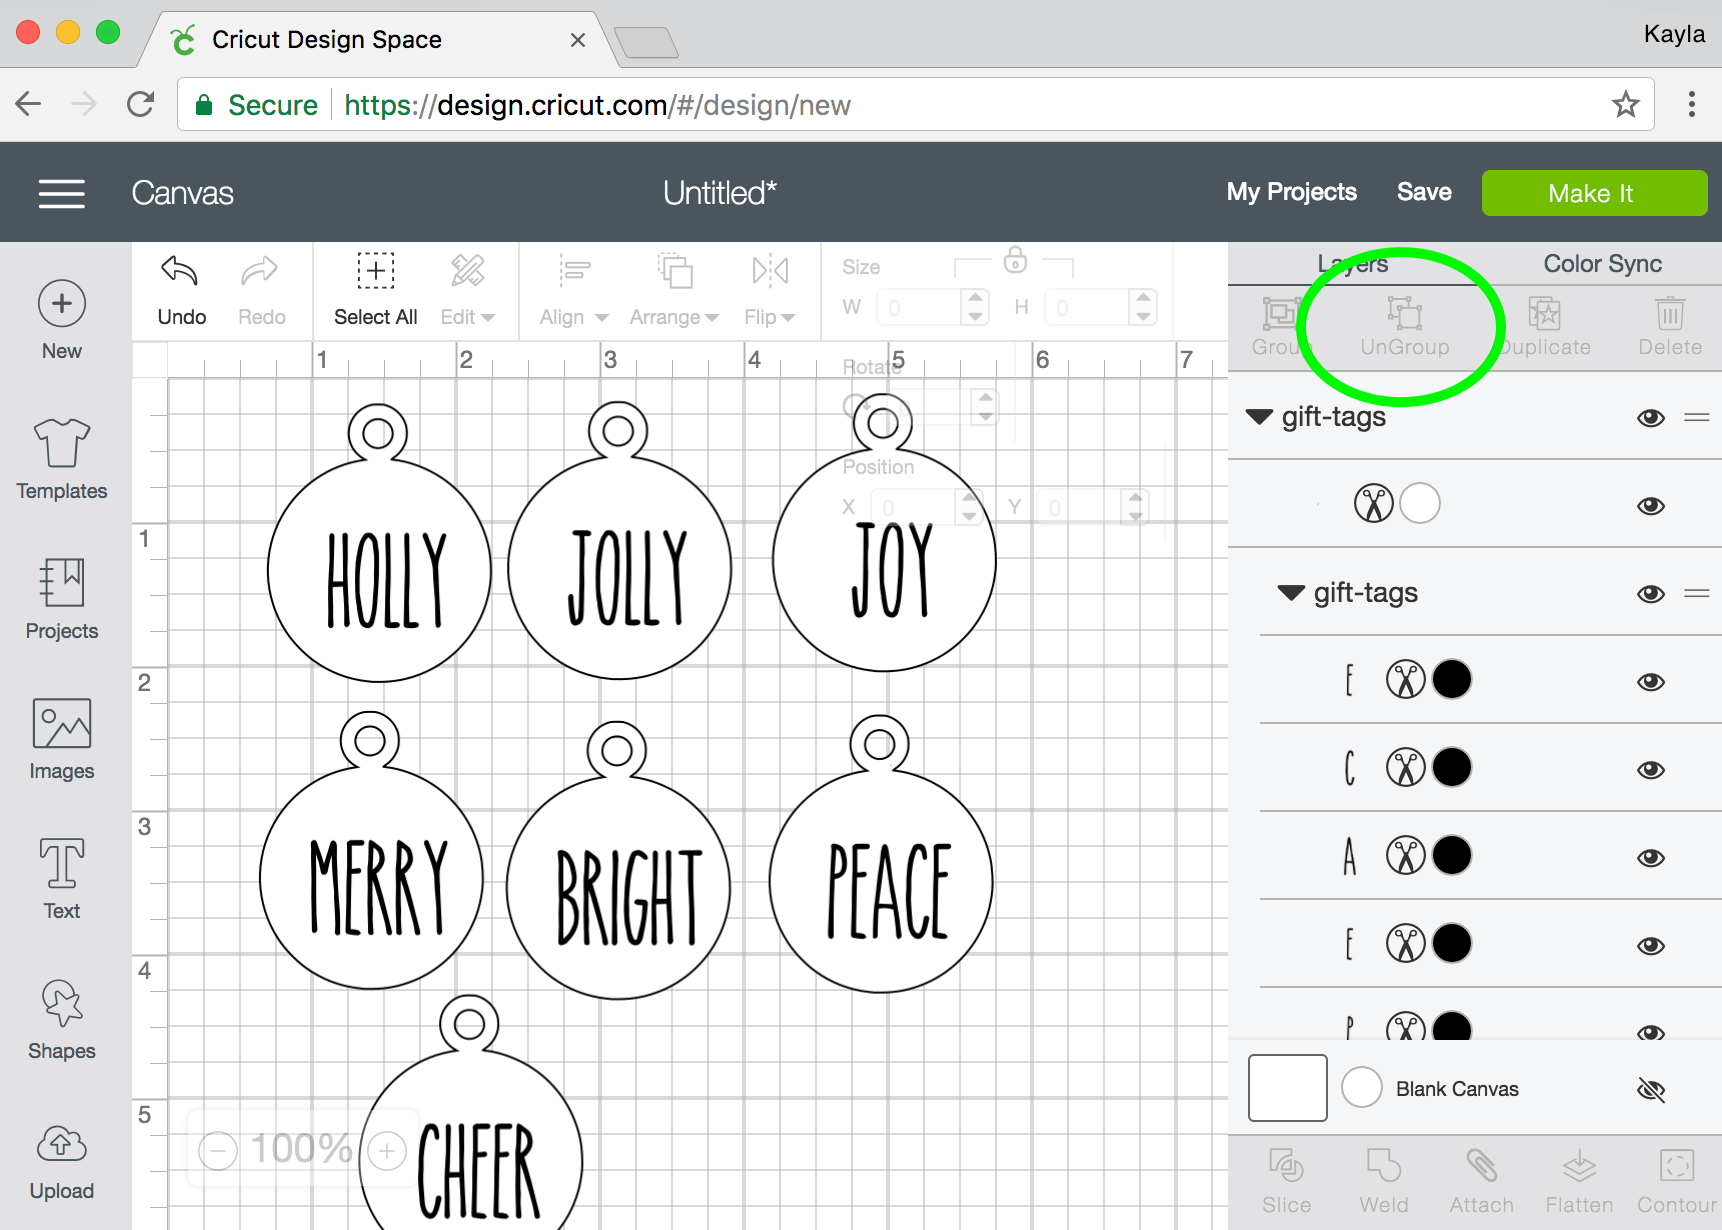
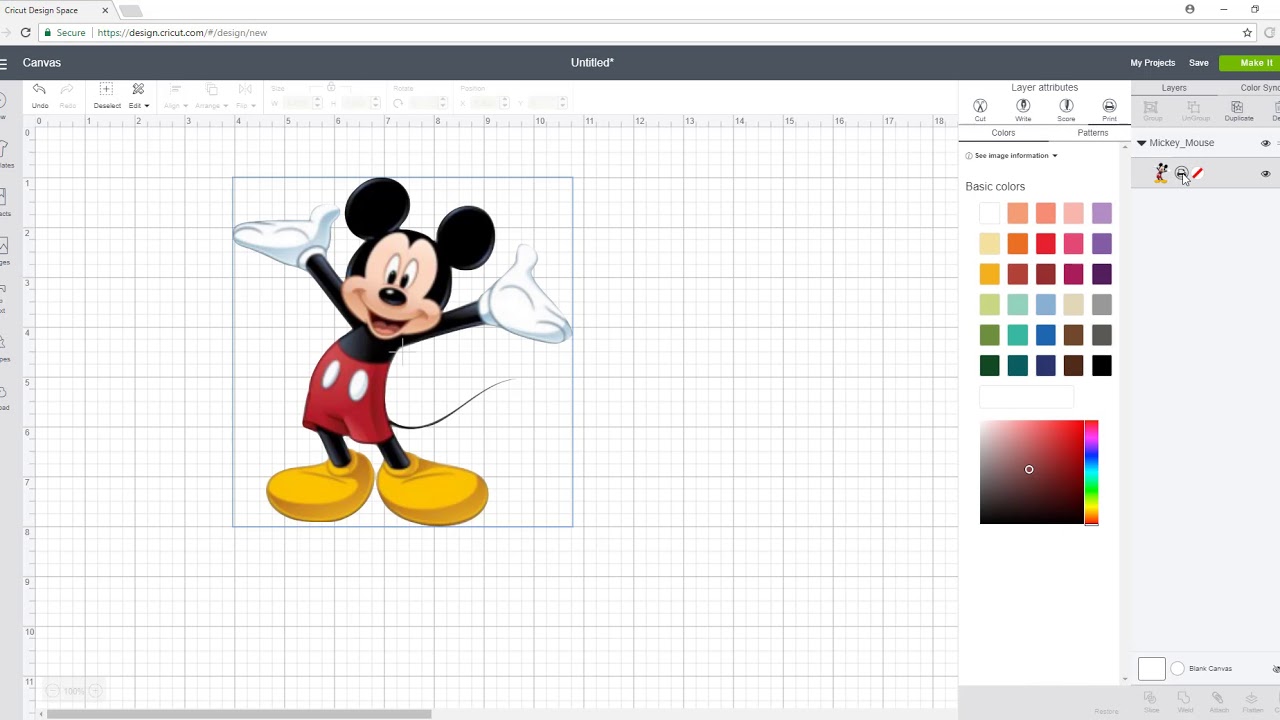
Make sure to choose the color you. This cannot be changed at this time. If your project has a print section turn that off by hiding it click on the layers eye.
Once you have cut the design move over to your print program and print out the design onto white copy paper. To cut printables stickers and other types of images you need to use the print then cut setting. Today you are going to learn whether you have maker or explore how to print and cut images with your cricut.
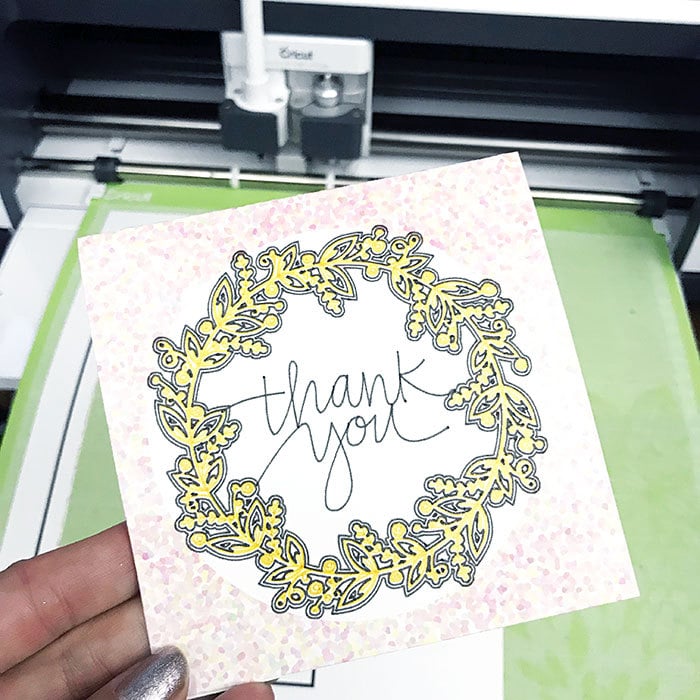
I love making cards and other crafts using print and cut as its a great way to add detail and depth to your handmade projects whilst keeping the perfectly smooth cutouts that you know and love. When you have an element or design set to print then cut. If youve never tried print cut on your cricut machine youre missing out.
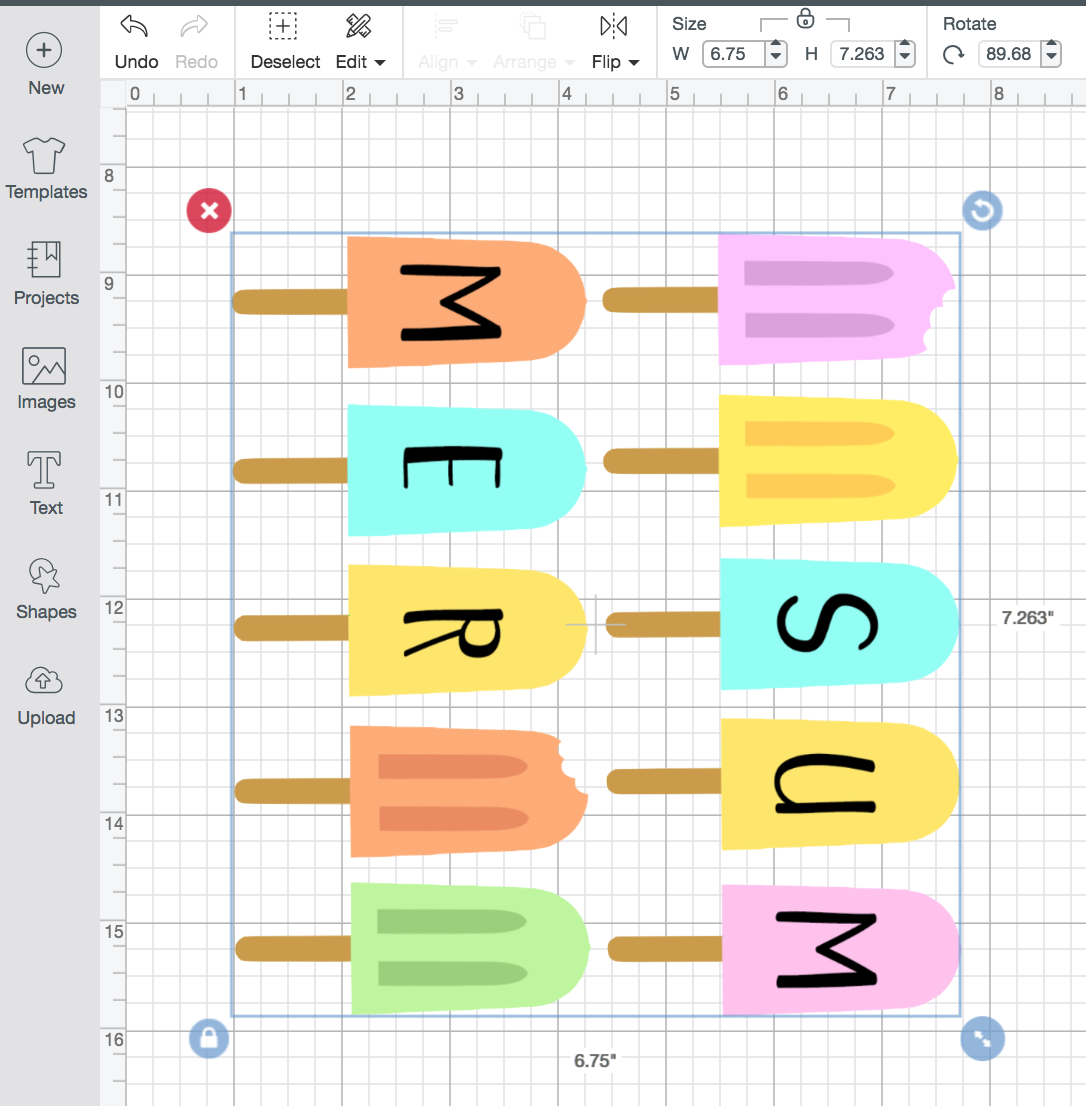
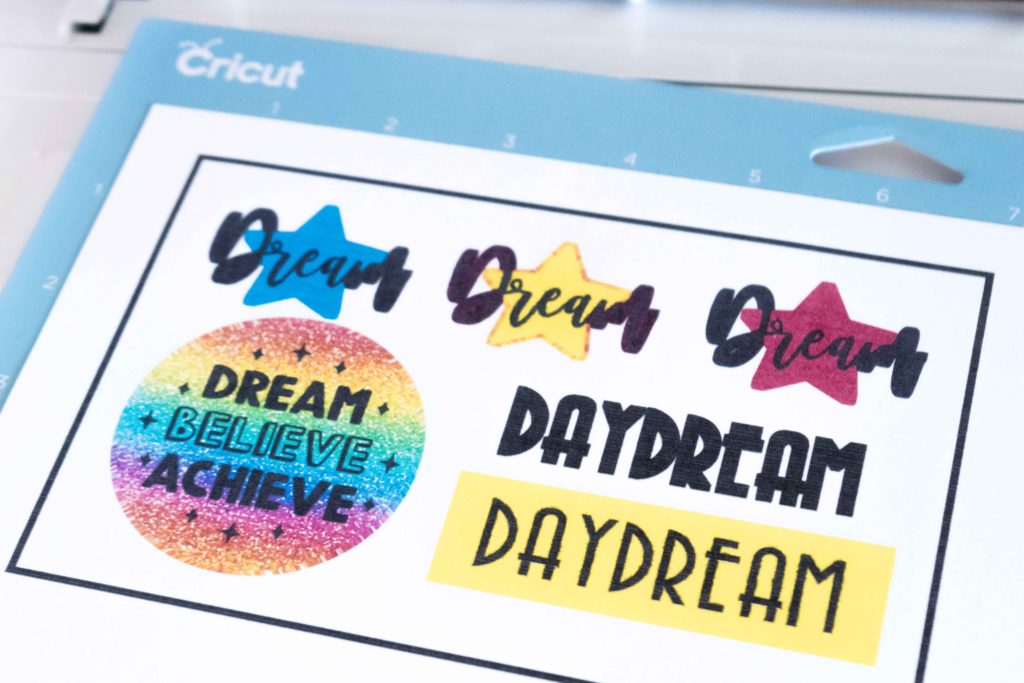
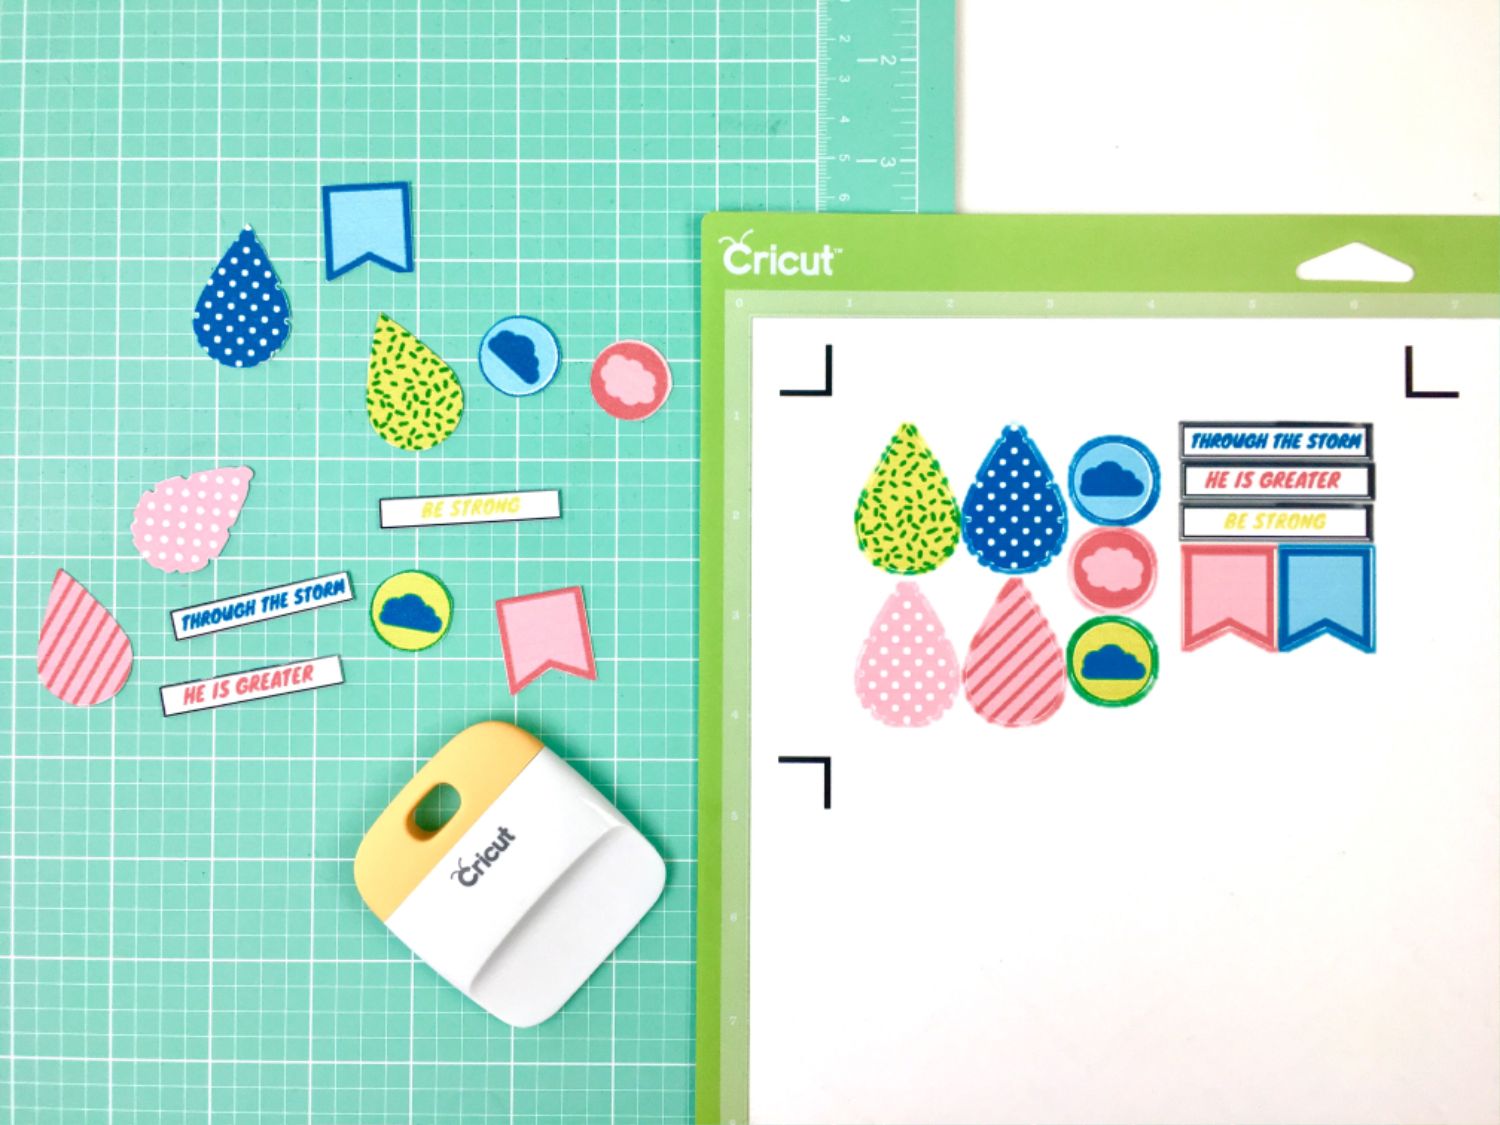
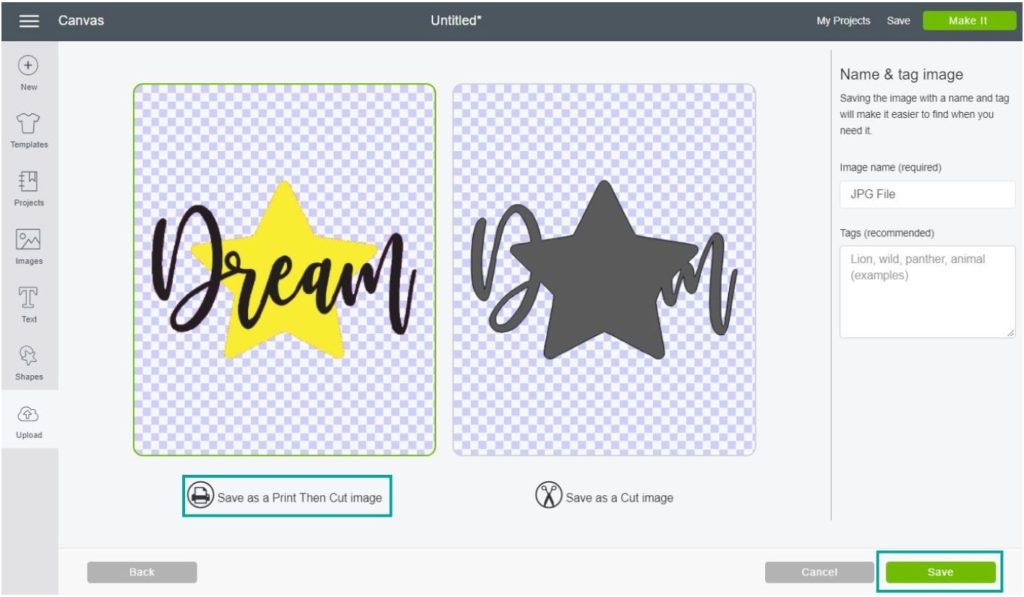
Upload a picture or choose an image from cricut design space you want to use as a sticker.

Cricut Print Then Cut Design Space 3 Youtube
www.youtube.com

Cut Not Print In Cricut Design Space Youtube
m.youtube.com

Cricut Maker Print Then Cut On Coloured Paper Youtube
www.youtube.com

Cricut Hack To Save Paper For Print Then Cut Images Crafty Julie
www.craftyjulie.com
Print And Cut With Cricut Explore Youtube
www.youtube.com
How To Use Print Then Cut Feature Using Cricut Design Space
www.thatswhatchesaid.net

How To Print Then Cut With Your Cricut Ultimate Tutorial
www.daydreamintoreality.com

Diy Print Then Cut Tags Coastal Kelder
coastalkelder.com
How Do I Print Then Cut In Design Space Help Center
help.cricut.com
Cricut Design Space Update How To Change From Cut To Print In New Update Youtube
www.youtube.com
Https Encrypted Tbn0 Gstatic Com Images Q Tbn 3aand9gcrm2 Uwmie5gsmgu4jkvthoawrsfcdrpg5eofzpxluzy2 1hli3 Usqp Cau
encrypted-tbn0.gstatic.com
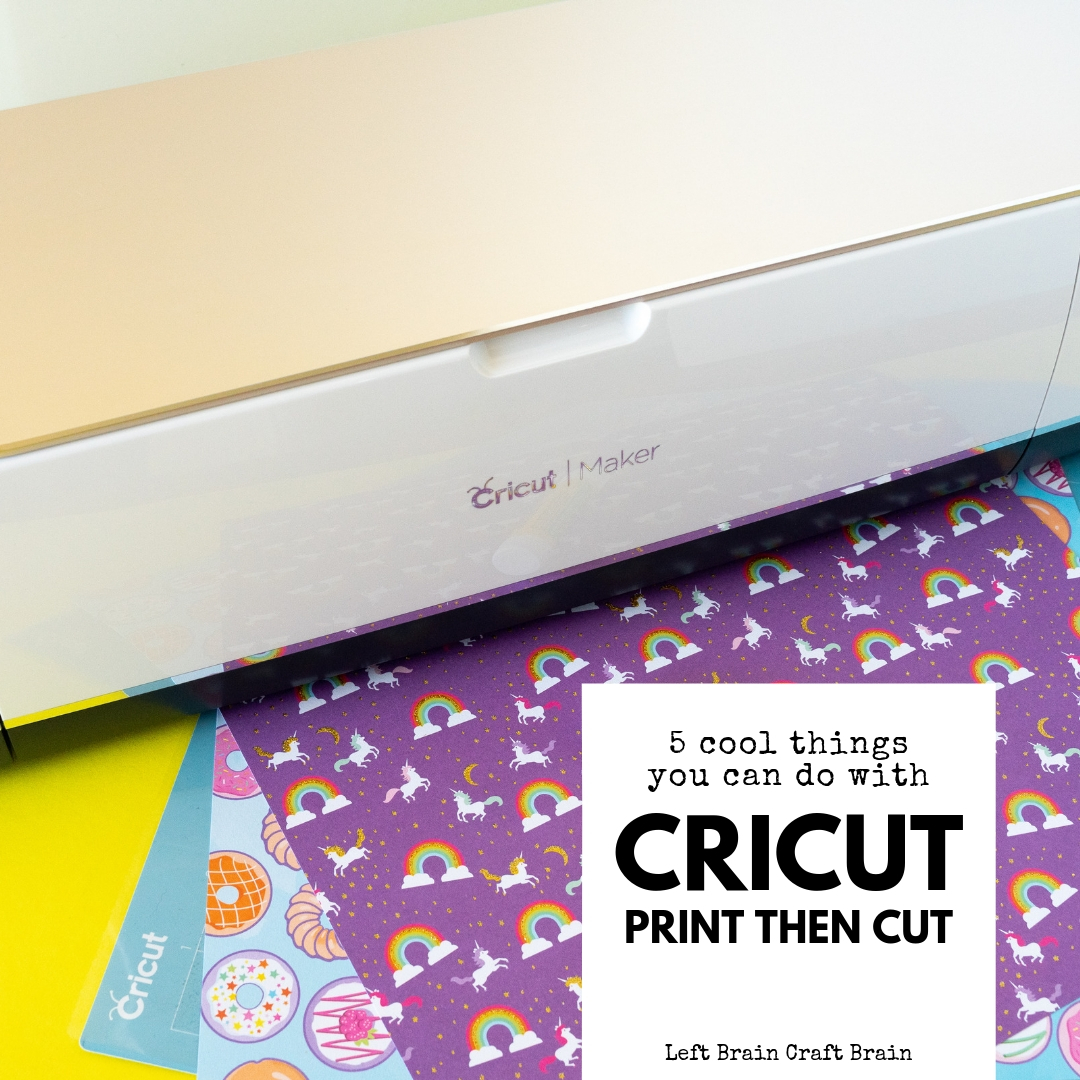
5 Cool Things You Can Do With Cricut S Print Then Cut Feature Left Brain Craft Brain
leftbraincraftbrain.com

Pin On Cricut
www.pinterest.com
How To Print Cut And Draw With Cricut 100 Directions
www.100directions.com

Print Then Cut With Cricut
fieldsofhether.blogspot.com
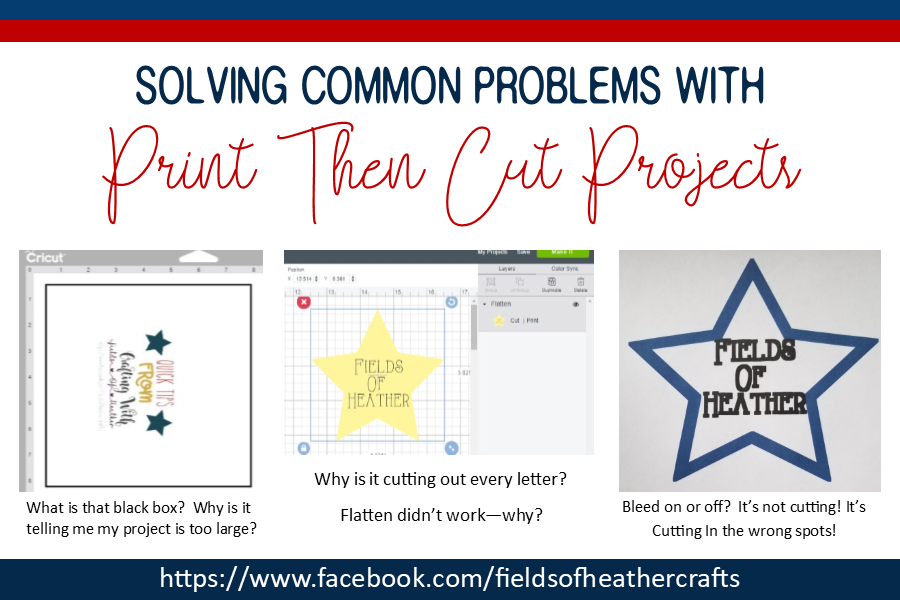
Solving Common Print Then Cut Problems
fieldsofhether.blogspot.com
Cricut Print And Cut All You Need To Know Leap Of Faith Crafting
leapoffaithcrafting.com
How Do I Print Then Cut With Writing Style Fonts And Images Help Center
help.cricut.com
How To Use Print Then Cut Feature Using Cricut Design Space
www.thatswhatchesaid.net

How To Use Cricut Print Then Cut Lemon Thistle
www.lemonthistle.com
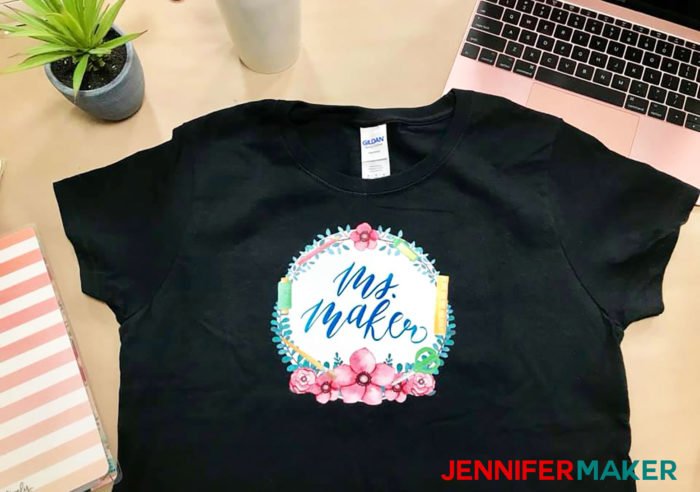
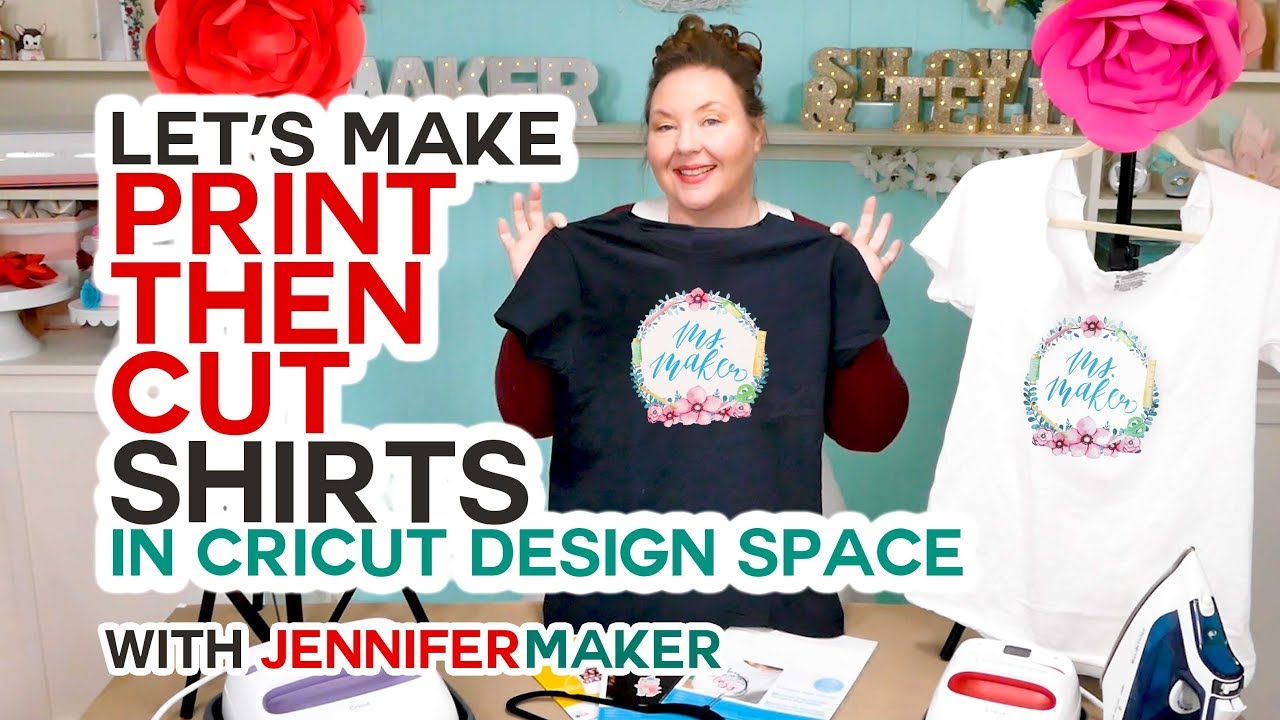
Print Then Cut Cricut Transfer T Shirts Jennifer Maker
jennifermaker.com
How To Print Then Cut With Your Cricut Ultimate Tutorial
www.daydreamintoreality.com
Trick Your Cricut To Do Full Page Print And Cut Sticker Tutorial Youtube
m.youtube.com

How To Use The Print Then Cut Feature In Design Space Otbm
overthebigmoon.com

How To Upload Cricut Print And Cut Files To Design Space Printable Crush
printablecrush.com
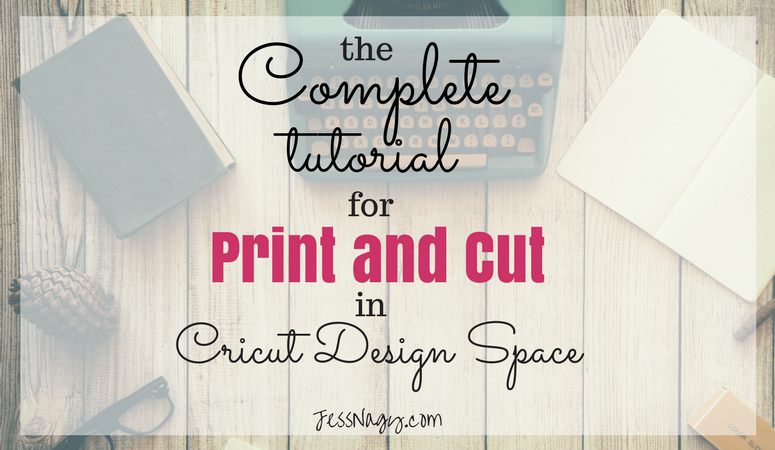
How To Use The Print And Cut Feature In Cricut Design Space Jess Nagy
jessnagy.com
How To Print Cut And Draw With Cricut 100 Directions
www.100directions.com

Cricut Design Space Full Page Print Then Cut Trick Cricutexplore Cricutmade Youtube
m.youtube.com

How To Print Then Cut Your Own Images On A Cricut Crafty Julie
www.craftyjulie.com

Cricut Design Space Change A Print Back To A Cut Youtube
www.youtube.com
Https Encrypted Tbn0 Gstatic Com Images Q Tbn 3aand9gcsaqfz0yzlslkiy3 Q8abx8tbg5snnlwnnhulj3lwo Usqp Cau
encrypted-tbn0.gstatic.com
How To Print Then Cut With Your Cricut Ultimate Tutorial
www.daydreamintoreality.com
Print Then Cut Cricut Transfer T Shirts Jennifer Maker
jennifermaker.com
How To Not Cut The Text When Using Print N Cut Details In Comments Cricut
www.reddit.com
Five Sixteenths Blog Tips For Cricut Explore Print Then Cut Making Stickers
www.fivesixteenthsblog.com
How To Use Cricut Print Then Cut Lemon Thistle
www.lemonthistle.com
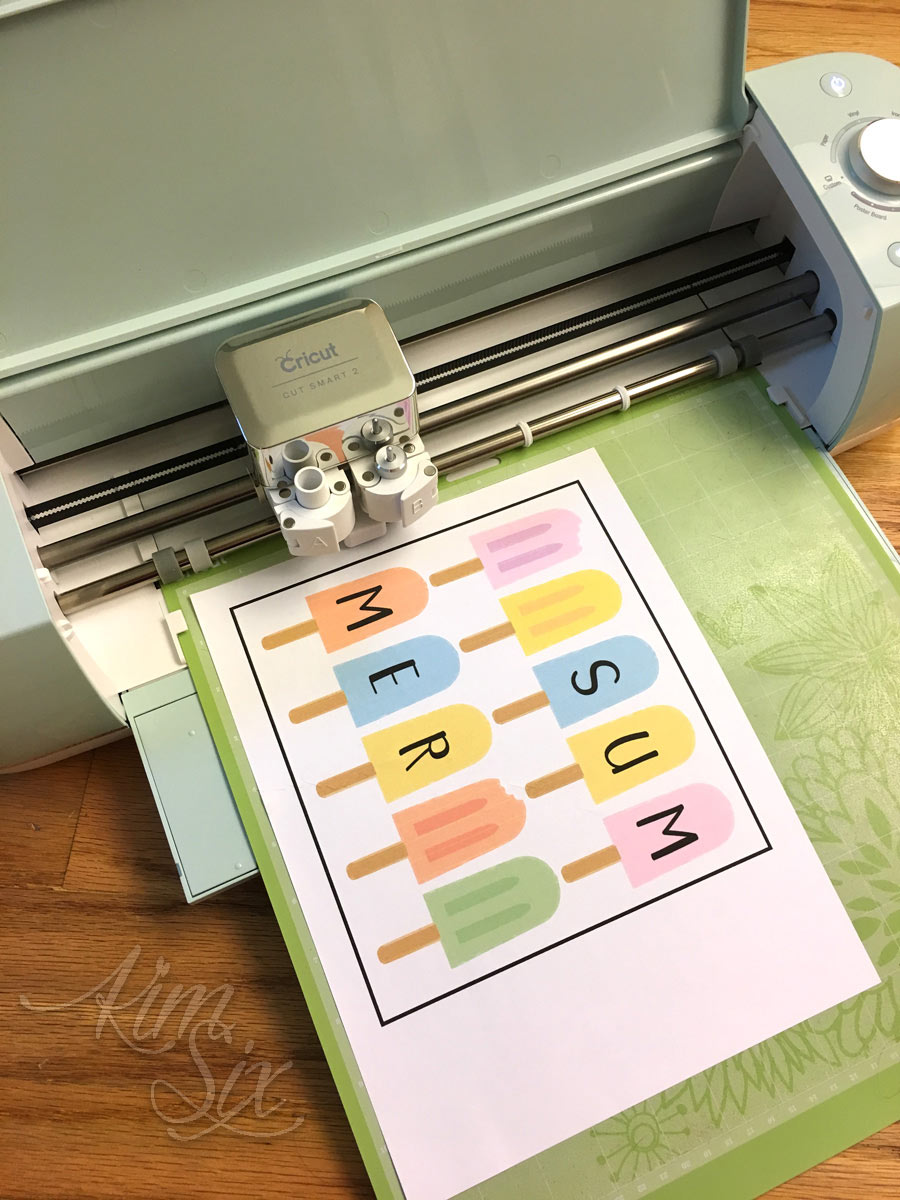
How To Print Then Cut With A Cricut Machine The Kim Six Fix
www.thekimsixfix.com
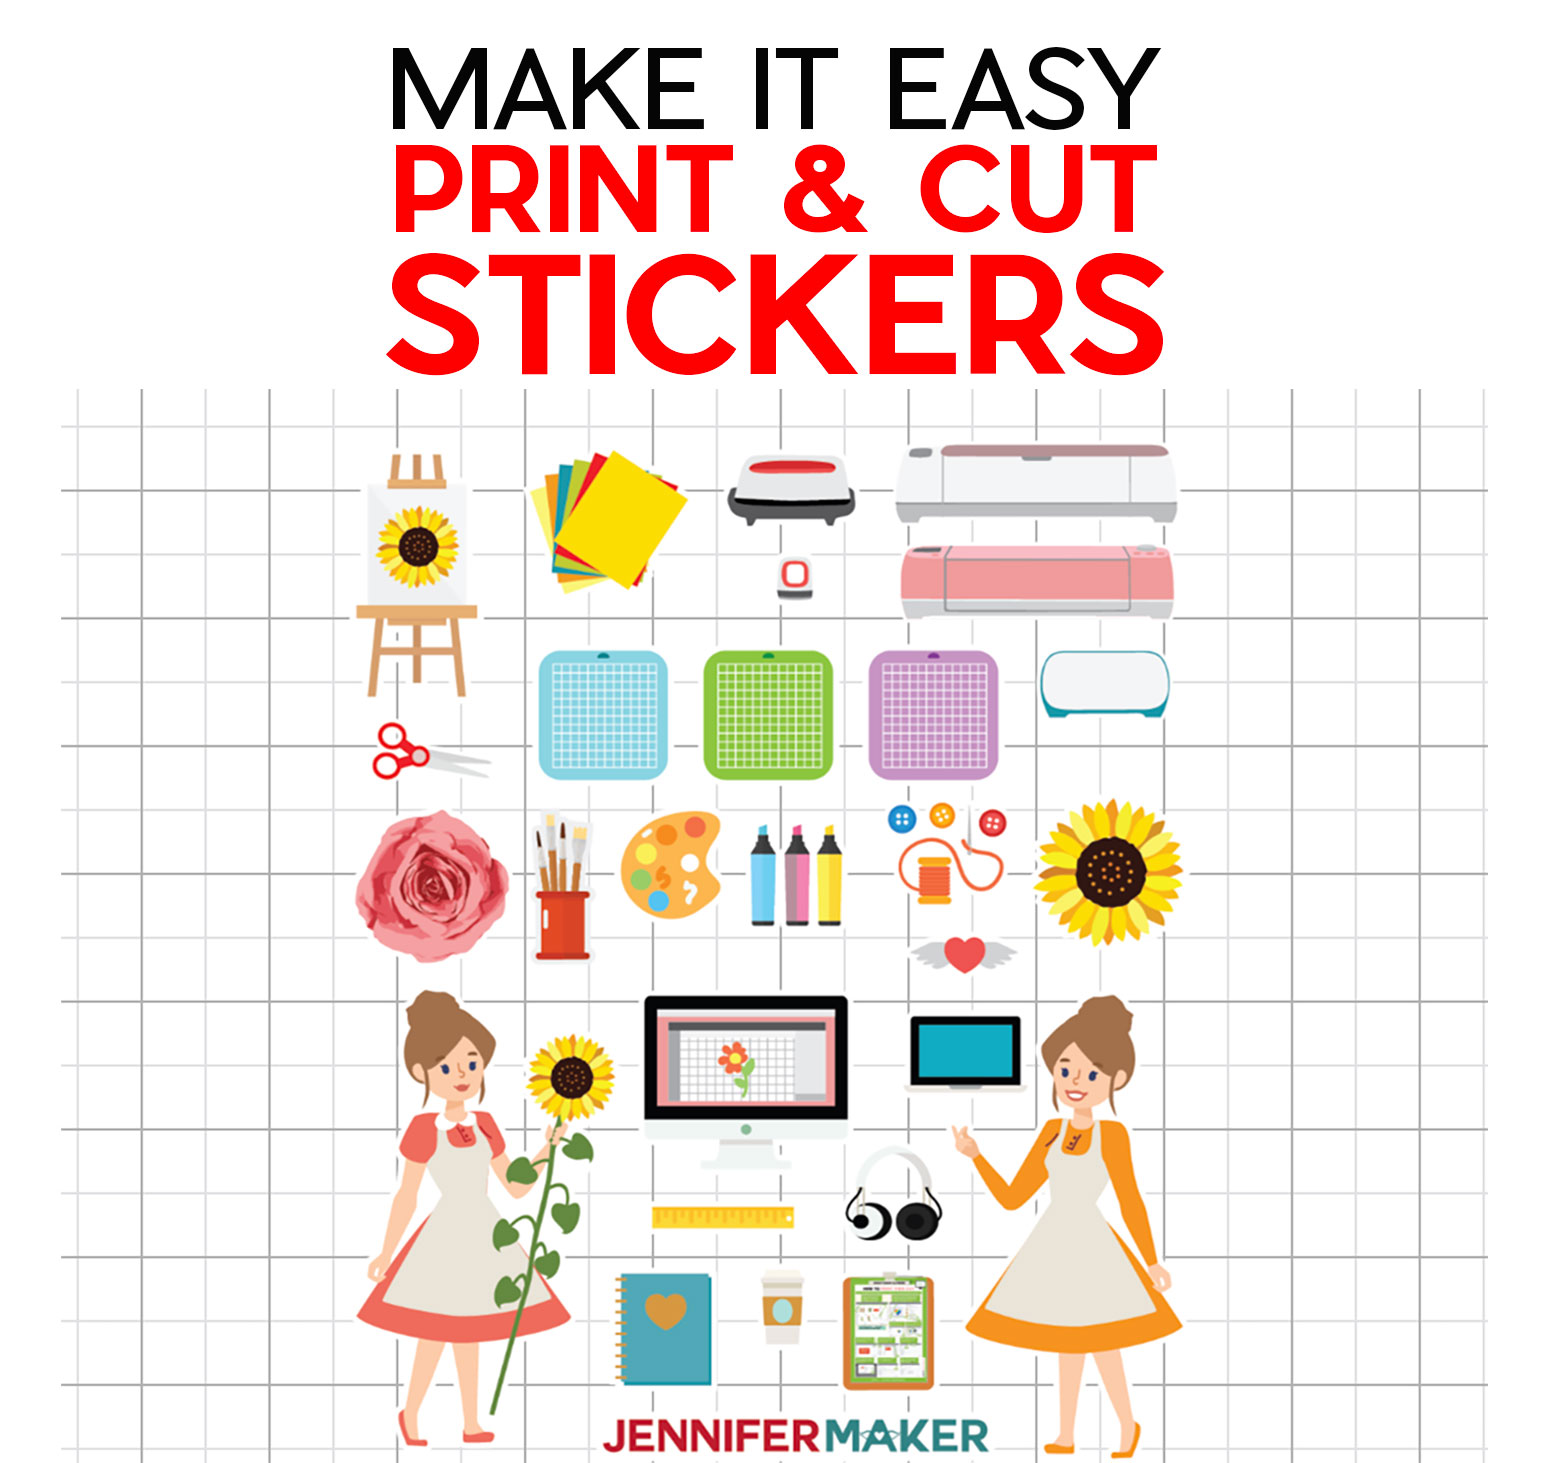
Easy Print Cut Stickers On A Cricut Jennifer Maker
jennifermaker.com
Simple Print And Cut Cricut Design Space Tutorial
lemonyfizz.com

How To Use Cricut Print Then Cut Suburban Wife City Life
suburbanwifecitylife.com
How To Print Then Cut With Your Cricut Ultimate Tutorial
www.daydreamintoreality.com
5 Cool Things You Can Do With Cricut S Print Then Cut Feature Left Brain Craft Brain
leftbraincraftbrain.com
How To Print Then Cut With Your Cricut Ultimate Tutorial
www.daydreamintoreality.com
How To Use Cricut Print Then Cut Lemon Thistle
www.lemonthistle.com
Make Print Then Cut T Shirts With Your Cricut The Right Way Youtube
www.youtube.com
1
encrypted-tbn0.gstatic.com
Using The Print Then Cut Feature With Cricut Explore Air 2 Plus Free Printable Southern Couture
www.thesoutherncouture.com

Pin On Cutting Machines And Cut Files
www.pinterest.com
How Do I Print Then Cut In Design Space Help Center
help.cricut.com

Print Cut Label Tutorial In Cricut Design Space Crafting A Family
www.craftingafamily.com

Cricut Print Then Cut Tutorial Youtube
www.youtube.com

Cricut Design Space How To Turn An Svg Into Print Then Cut So Fontsy
sofontsy.com

How To Use Print Then Cut Feature Using Cricut Design Space
www.thatswhatchesaid.net
How To Print Then Cut With Your Cricut Ultimate Tutorial
www.daydreamintoreality.com
How To Print Then Cut Cricut Crafting In The Rain
craftingintherain.com

Print Then Cut Common Mistakes For Cricut Design Space Newbies Youtube
www.youtube.com

How To Print Then Cut With Your Cricut Happy Go Lucky
www.happygoluckyblog.com

Full Page Cricut Print And Cut Hack By Pink
by-pink.com
How Do I Print Then Cut In Design Space Help Center
help.cricut.com

How To Use Print Then Cut With Cricut Maker From Start To Finish All For The Memories
allforthememories.com

Using The Print Then Cut Feature With Cricut Explore Air 2 Plus Free Printable Southern Couture
www.thesoutherncouture.com

Pin On Print Then Cut Cricut Projects
www.pinterest.com

Help My Cricut Is Cutting The Inside Of My Print Then Cut Image Lydia Watts
lydiawatts.com
How Do I Print Then Cut In Design Space Help Center
help.cricut.com
Print Then Cut With Cricut Kayla Makes
kaylamakes.com

You Can Now Print Then Cut On Colored Paper With The Cricut Maker Cricut
inspiration.cricut.com
Solving Common Print Then Cut Problems
fieldsofhether.blogspot.com
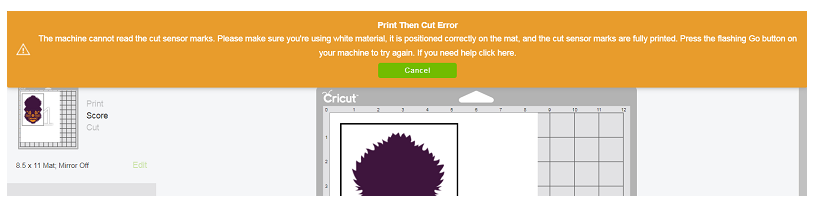
I M Getting An Error That The Machine Cannot Read The Cut Sensor Marks Help Center
help.cricut.com
How To Use Print Then Cut Feature Using Cricut Design Space
www.thatswhatchesaid.net

Print Then Cut Stickers With The Cricut Explore Air 2 Ever After In The Woods
everafterinthewoods.com
How To Use The Print And Cut Feature In Cricut Design Space Tastefully Frugal
tastefullyfrugal.org
Cricut Print And Cut All You Need To Know Leap Of Faith Crafting
leapoffaithcrafting.com

How To Make Stickers With Your Cricut Free Sticker Layout Templates
www.daydreamintoreality.com

Cricut Print And Cut All You Need To Know Leap Of Faith Crafting
leapoffaithcrafting.com
Changing An Image From Print And Cut To Just Cut In Cricut Design Space Youtube
www.youtube.com
How To Print Then Cut With Your Cricut Ultimate Tutorial
www.daydreamintoreality.com

Pin On Cricut
www.pinterest.com
Cricut Design Space Us Craft Blog The Crafty Blog Stalker
thecraftyblogstalker.com

Top Printer Choices For Cricut Print Then Cut Scrap Me Quick Designs
www.scrapmequickdesigns.com

Print And Cut Cricut Explorer Air Youtube
m.youtube.com

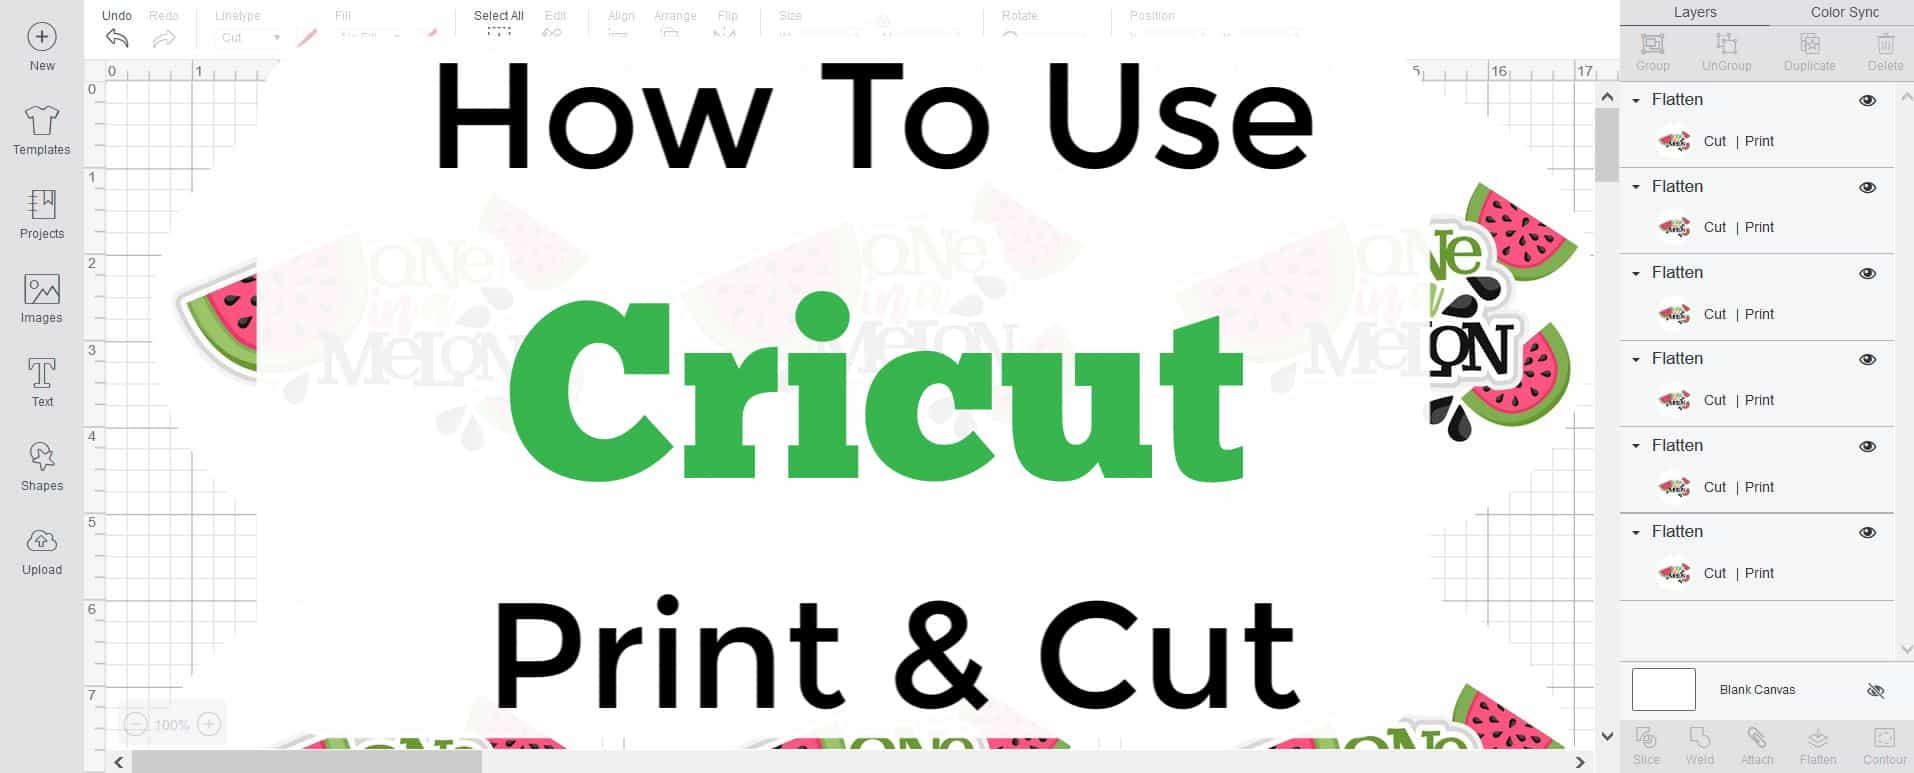
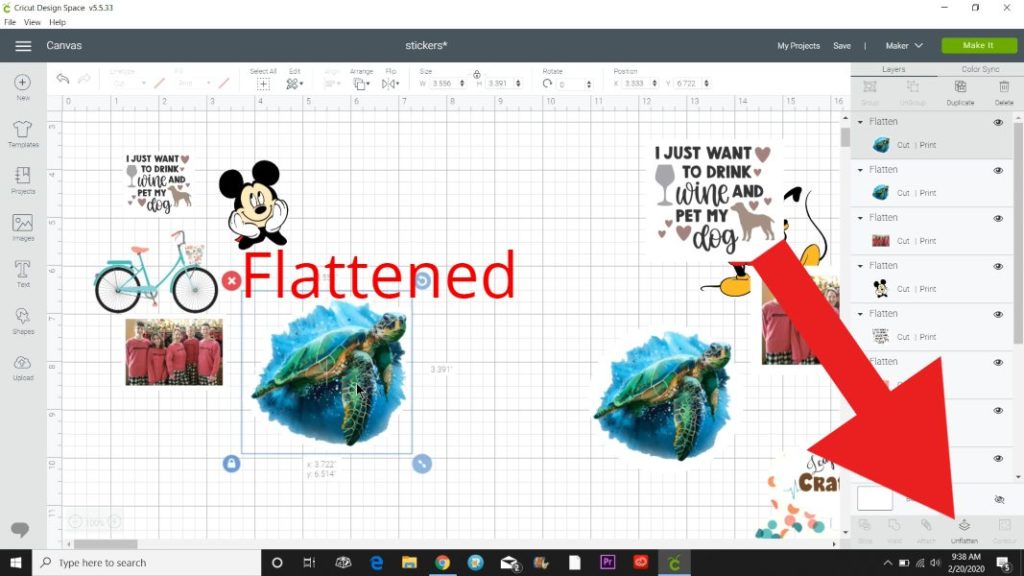
Cricut Design Space Tutorial Flatten Command For Print And Cut Youtube
www.youtube.com

Pin On Cricut Ideas
www.pinterest.com
How To Use Print Then Cut Feature Using Cricut Design Space
www.thatswhatchesaid.net
How To Print Then Cut With A Cricut Machine The Kim Six Fix
www.thekimsixfix.com
How Do I Print Then Cut In Design Space Help Center
help.cricut.com

Cricut Print And Cut Tips And Tricks To Getting Brighter More Vibrant Colors By Pink
by-pink.com

Cricut Maker Print Then Cut On Colored Paper Help Center
help.cricut.com

Troubleshooting The Print Of Cricut Print Then Cut
ithappensinablink.com
Troubleshooting Cricut S Print Then Cut Calibration Hey Let S Make Stuff
heyletsmakestuff.com

Pin On Cricut Projects And Svg Files
www.pinterest.com
How To Print Then Cut With Your Cricut Ultimate Tutorial
www.daydreamintoreality.com
The Non Crafty Crafter Cricut Print Then Cut Maximum Size
www.thenoncraftycrafter.com
Calibrating Your Machine For Print Then Cut Help Center
help.cricut.com
Https Encrypted Tbn0 Gstatic Com Images Q Tbn 3aand9gcsam0o7rywljtobmt1m1uigywofo0rda2fidx6xy2qpxcuysdy3 Usqp Cau
encrypted-tbn0.gstatic.com

Full Page Cricut Print And Cut Hack By Pink
by-pink.com

How To Upload Cricut Print And Cut Files To Design Space Printable Crush
printablecrush.com
Print Then Cut Cricut Transfer T Shirts Jennifer Maker
jennifermaker.com
How Do I Print Then Cut With Writing Style Fonts And Images Help Center
help.cricut.com